Top 4 Ways to Transfer Data from Windows 8.1 to Windows 11
In this article, you can learn why you need to transfer data from Windows 8.1 to Windows 11, and you can also learn four effective ways to transfer data to new Windows system.
By Miya Updated on June 16, 2023
Why we need to transfer data from Windows 8.1 to Windows 11?
As you may already know, the latest version of Windows 11 has been officially released. Microsoft says that if you are currently using any Windows system such as Windows 8.1 that meets the minimum system requirements for Windows 11, and you can upgrade to Windows 11 for free.
![]()
If you use Check for Updates or Windows 11 Installation Assistant to upgrade Windows 8.1 to Windows 11 for free, your files may remain in the same state as they were in Windows 8.1. So in this case, you don't need to transfer data from Windows 8.1 to Windows 11.
However, if your computer does not meet the system requirements for Windows 11, or if you choose to install Windows 11 cleanly, you may lose all your data in the process unless you keep a copy of your files beforehand.
How to transfer data form Windows 8.1 to Windows 11
Whatever your situation, you can learn the following 4 useful ways below to transfer data from your computer over a network or without the Internet.
1. Use Windows Easy Transfer to transfer files from PC to PC
Windows Easy Transfer is a built-in tool in Windows OS for transferring files and personal settings from one computer to another. However, Windows Easy Transfer is not available in Windows 10 and later operating systems.
You must have a specific "Windows Easy Transfer Cable" to connect two computers and transfer data. Otherwise, you should use Windows Easy Transfer to copy data to external storage (e.g. USB disk) and then transfer it to the destination. So we don't recommend this way to transfer data to new computer on Windows 11.
You can follow these steps to transfer data from Windows 8.1 to Windows 11 with Windows Easy Transfer:
Step 1. Type Windows Easy Transfer and hit enter to open this program.
Step 2. Click Next. Then, choose one transferring channel, and confirm whether the targeted computer is a new one or the previous one.
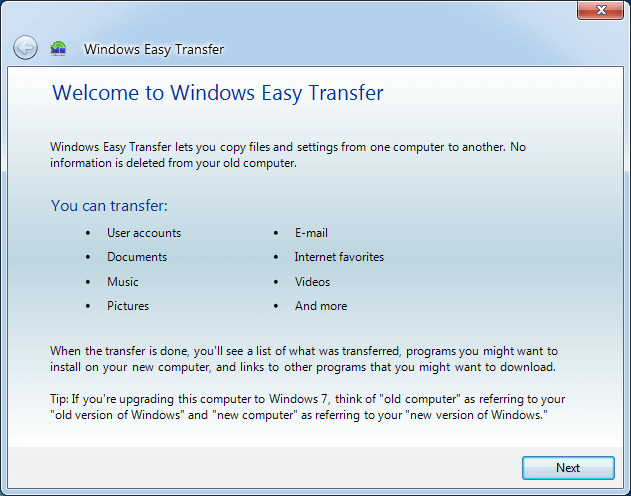
Step 3. You will create a Windows Easy Transfer key that will be confirmed on the destination computer for Windows transfer.
2. Use the cloud storage to complete PC to PC file transfer
You can use cloud storage sync tools such as OneDrive or Google Drive to transfer data from Windows 8.1 to Windows 11.
Depending on the data size and network speed, this process may take some time to upload and download. Also, if you have a large amount of personal data, the free storage from the cloud provider may not be enough and you will need to purchase additional storage to transfer data to new laptop on Windows 11.
Step 1. You have to upload the required files and folders from the old computer to the cloud drive. Wait until all data is synced without any errors.
Step 2. Connecting the same cloud storage on the new computer will download data and save the data locally.

3. Use a USB external hard drive or flash drive to transfer data to new PC
If only a few files need to be transferred, you can transfer these files directly to another computer by copying and pasting them using an external storage media.
Step 1. Connect your USB external hard drive to your Windows 8.1 computer and open File Explorer, click This PC in the sidebar to find your drive, and open a new window.
Step 2. Copy all the files you want to transfer to a folder and select the Copy option.
Step 3. Go back to your drive in file explorer and select the Paste option, then your files will start transferring, just wait until the process is complete.
Step 4. Disconnect your drive from Windows 8.1 and then connect it to your Windows 11 computer. Then, open your drive in File Explorer, copy the folders you previously saved in your external drive, and paste them into your current computer.
Now, you have completed the process of transferring data from old computer to new on Windows 11.

4. Use easy and free Transfer tools - AOMEI Backupper (recommended)
Whether your computer has Internet or not, you can use the easy and free sync software AOMEI Backupper Standard to transfer data from Windows 8.1 to Windows 11 (e.g. documents, videos, emails, photos and other kinds of data) with the help of different storage devices including cloud drives, shared drives or NAS, network drives, external hard drives, USB flash drives, etc.
Please download the free file sync software - AOMEI Backupper Standard to transfer files. For server users, please try AOMEI Backupper Server!
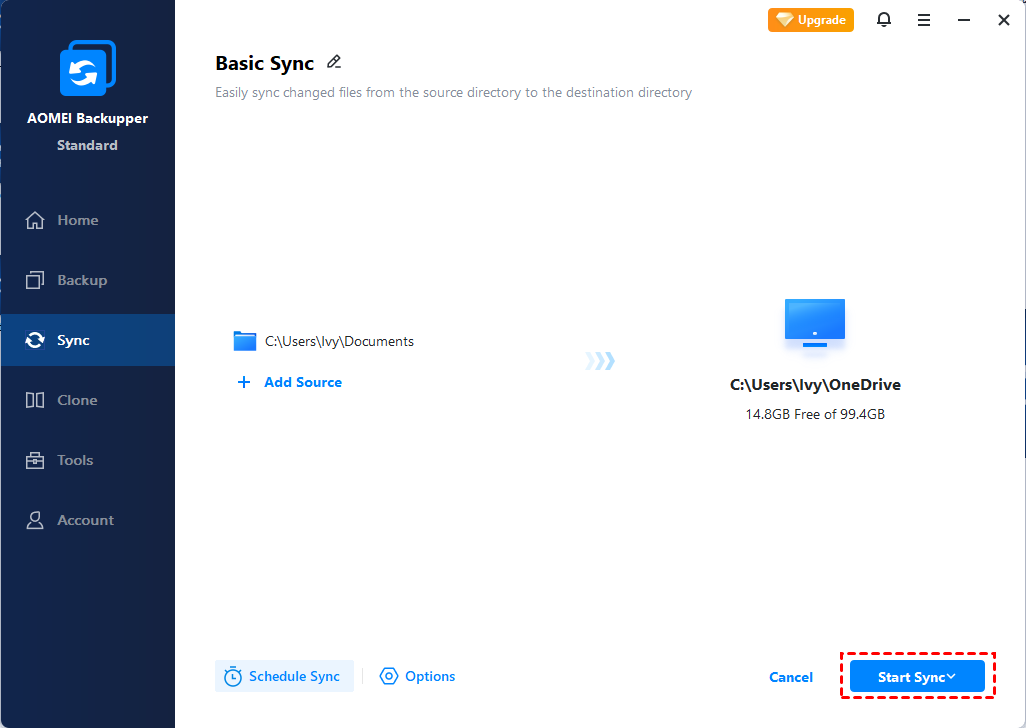
Step 1. Run the free sync software - AOMEI Backupper Standard. then, navigate to Sync and Basic Sync.

Note: If you want to synchronize your files in real-time, you need to use the Real-Time Sync feature. It will track your files as soon as you make changes to them.
Step 2. In the Basic Sync window, click Add Folder and select the folder that contains all the files you want to transfer from Windows 8.1 to Windows 11.
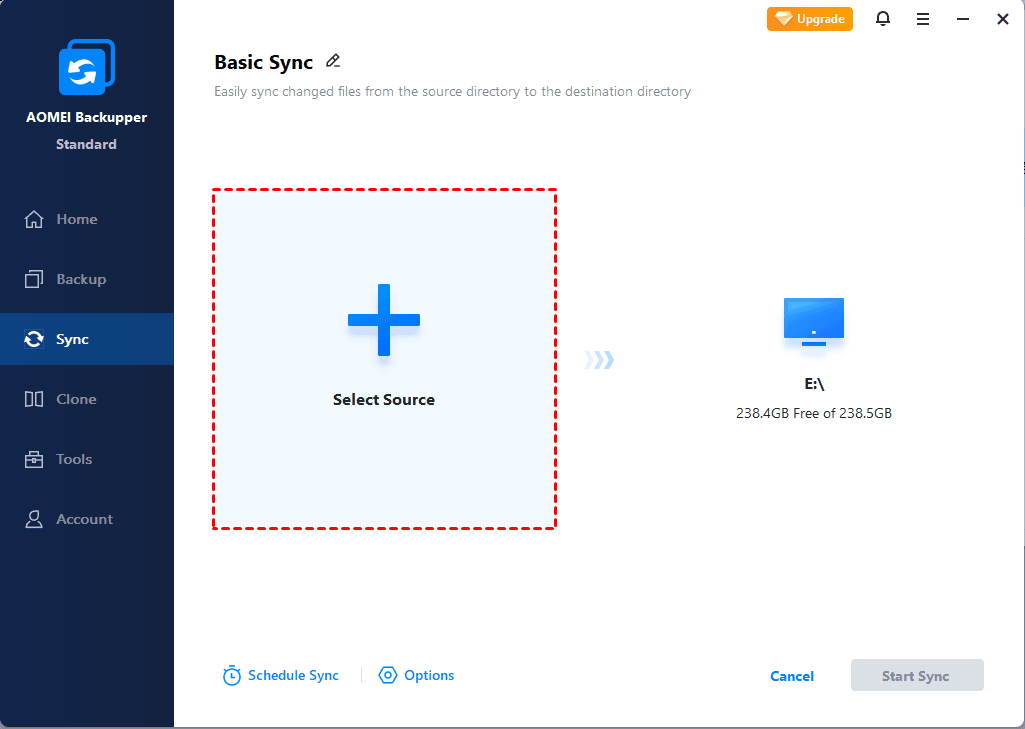
Note: If you want to sync multiple folders, you can click “+” to continue adding folders.
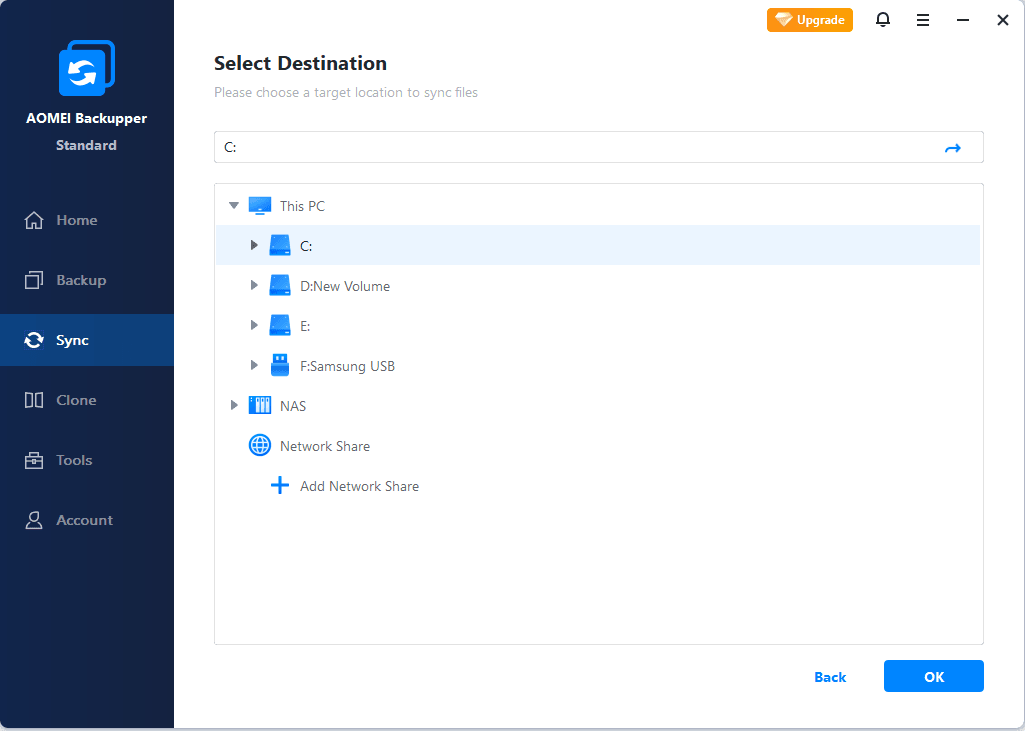
Step 3. After selecting the files, you need to choose a way to transfer the data from Windows 8.1 to Windows 11.
☞ From local path: Click Select local path and choose an external hard drive or USB drive. Please connect it to your computer and make sure it is recognized.
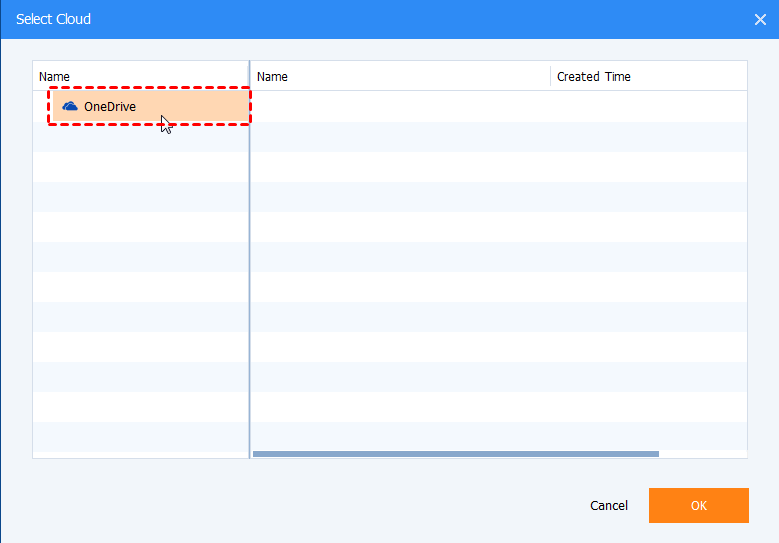
☞ From Cloud Drive: If you want to sync files to OneDrive in Windows 8.1, click Select a Cloud Drive. Make sure you download and sign in with your account.
☞ From NAS or network share: If you want to sync folders to a network drive or NAS, click Add Share or NAS device. Make sure you have read and write priority. Otherwise, you will not be able to connect it.
Here is an example of Select a cloud drive.
Then, in the Select Cloud window, select OneDrive and click OK to confirm.
Step 4. Confirm the sync task and set the schedule settings if you want to get changed. Select Daily, Weekly, Monthly, Event trigger and USB plug in the Schedule Sync feature and click Start Sync to transfer data from Windows 8.1 to Windows 11.
Tip: If you want to automatically synchronize deletions, you can select the "Sync the deletions in the source directory to destination" setting in Options.
In addition to OneDrive, the software also provides you with a Cloud Backup to help you transfer your data. It will back up your Windows 8.1 files to the AOMEI Cloud, and then you can restore them on your Windows 11 computer. And, it offers 1TB of free storage for 15 days after you sign up for an AOMEI account.
Now you can transfer data from old computer to new Windows 11.
Summary
You may already know how to transfer data from Windows 8.1 to Windows 11 with 4 effective ways, if you want to keep your data sync in the easiest way or on a regular basis, try the free synchronization software - AOMEI Backupper Standard. It supports various storage devices, not only OneDrive, external hard drives, but also other storage devices recognized by Windows, and gives you a schedule sync feature to transfer data to new PC on Windows 11 synchronously on a daily, weekly or monthly basis.
In addition, it has more advanced sync methods such as real-time sync, mirror sync, etc. Please upgrade to the Pro version to unlock these features.