We Couldn't Update System Reserved Partition in Windows 11/10
If you have no idea how to tackle the "We can't update the System Reserved Partition in Windows 11" problem, you can find the best solutions here to easily finish this task.
By Jonna Updated on October 31, 2024
Scenario: We couldn't update the system reserved partition
How do I update a reserved partition?
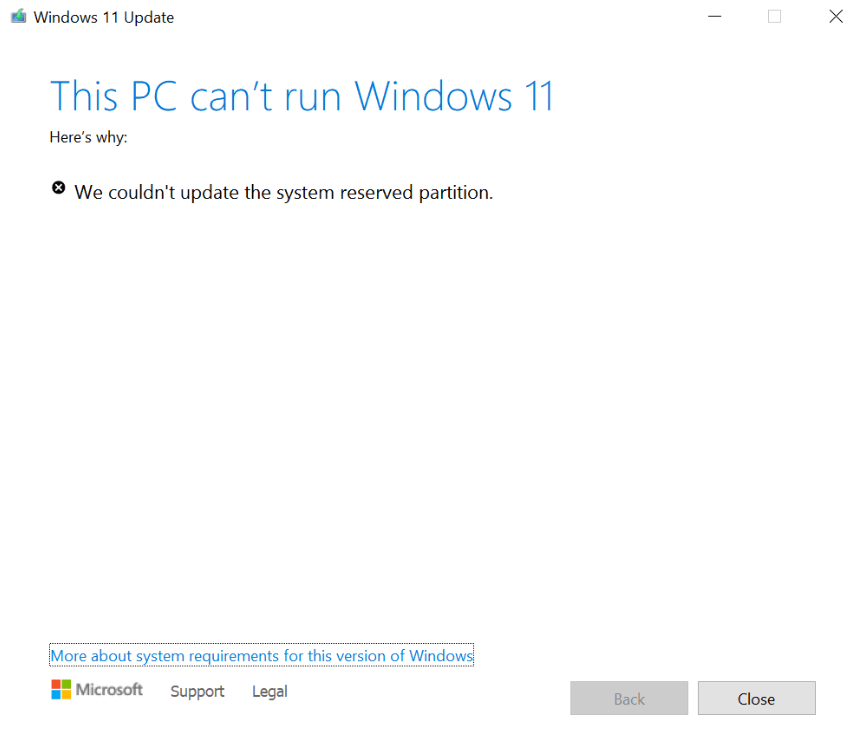
Hello everyone! I want to update my PC to Windows 11 pre-release, but it says, "We couldn't update the system reserved partition. What can I do?
- Question from Microsoft Community
Updating your system in time can effectively prevent major vulnerabilities in your PC and give you a better experience. However, the process of system installation and update may cause various problems, such as the error message mentioned in the case of Windows 11.
This article will introduce what is causing this problem and if there's a way to fix it. Please read the following contents carefully for more details.
Possible Causes of "We couldn't update System Reserved Partition"
When you are trying to upgrade from Windows 10 to Windows 11 or upgrade to Windows 11 22H2, you might encounter the error "We couldn't update System Reserved Partition." This error indicates that there is no System Reserved Partition in Windows 11/10. The Windows 11/10 System Reserved Partition size should be at least 300 MBs to 450 MBs to ensure a smooth system update. 3 reasons may likely cause this problem:
⚘ An almost full System Reserved Partition (SRP) that can't be written into anymore may cause this error.
⚘ It is also possible that there is a problem with the internal driver of the System Reserved Partition itself
⚘ Additionally, some third-party security and antivirus applications write into the SRP and can quickly fill it up.
If this issue also bothers you, you can find the best solutions here.
Preparation: Backup your Windows 11 in case of system failure
You need to be aware that these steps are complicated for computer beginners and are risky for your computer, and you need to perform each step carefully. If you make a mistake while entering these commands, you may leave your device in a no-boot state and may lose the data you have stored on the device. Therefore, we strongly recommend that you first backup your important personal files and data to avoid accidental data loss.
Here I strongly recommend you use the best free backup software - AOMEI Backupper Standard to help you finish this task. It is an all-in-one data protection solution designed for Windows 11/10/8/7/Vista/XP, which allows you to automatically backup files, system, disks, and partitions in daily, weekly, and monthly frequency to multiple destination paths such as external hard drives, USB flash drives, NAS devices, clouds and so on.
You can follow the steps shown below to make a copy of your Windows 11 with AOMEI Backupper Standard as a disaster recovery solution. Just download and install this freeware to back up Windows 11 now.
Step 1. When you run this tool, click System Backup under the Backup tab.

Step 2. The program automatically chooses the system-related partition(s) as the source data. You just need to select a destination path. To back up Windows 11 to external hard drive, please plug it into the computer in advance.

Step 3. Click Start Backup to back up your Windows 11 operating system.

Having a system backup image in hand, now you can feel free to follow the steps provided below to fix "We couldn't update System Reserved Partition in Windows 11."
Fix Windows 10/11 System Reserved Partition update errors easily
To upgrade your Windows 10/11 device, you need to use the appropriate method below to free up 15MB of space on the SRP and then try the upgrade again.
If you want to update Windows 10/11, you only need to free up 13MB of space. Now, let’s begin the fix process.
Determine whether the SRP is GPT or MBR partition style
Before it gets started, you need to determine whether the SRP is GPT or MBR partition style. You may wonder how do I check my System Reserved Partition space? You can learn the specific steps below.
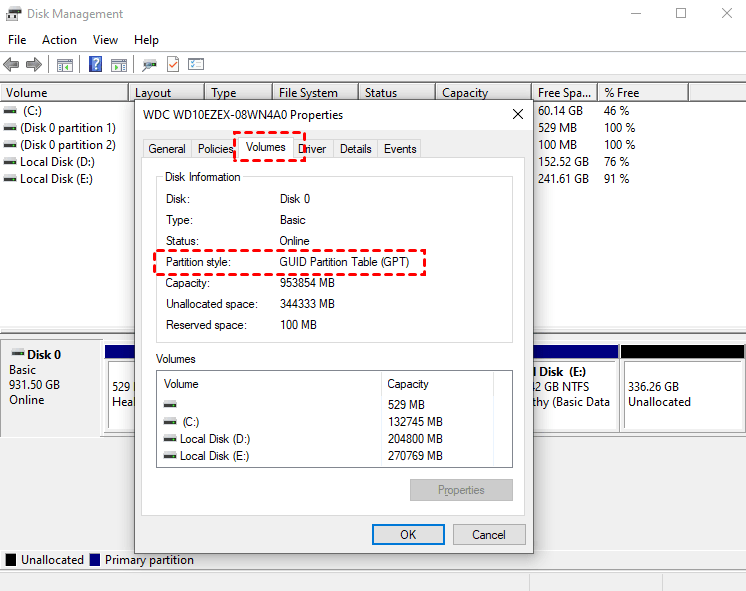
1. Press the Windows + R together to open the Run window. Be sure to type diskmgmt.msc and press Enter.
2. Right-click on the Disk that contains the SRP, and select Properties. Switch to the Volumes tab, and you can see the partition style: either GUID Partition Table (GPT) or Master Boot Record (MBR).
Steps for Windows 10/11 with MBR partition
If your partition style is MBR, you can follow the steps below to solve this issue.
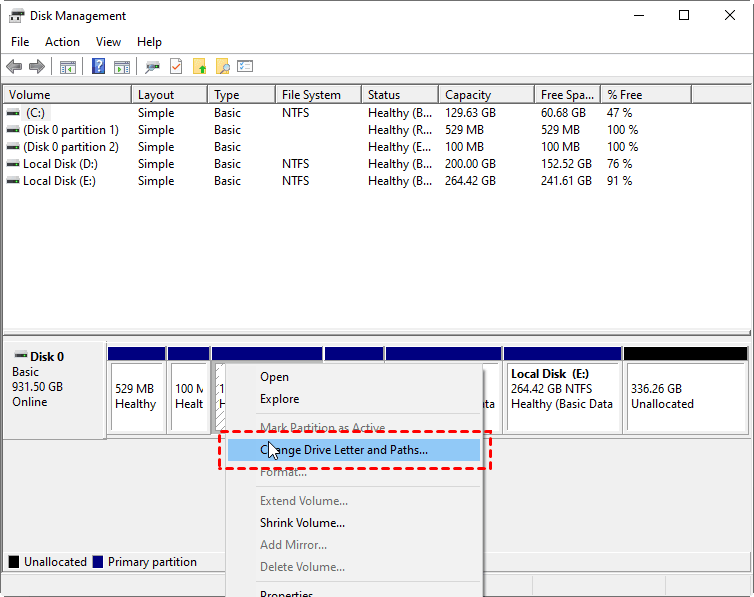
1. Right-click the Start button and choose Disk Management from the search results.
2. Next, be sure to select the partition marked System Reserved Partition. Right-click on it and select Change Drive Letter and Paths.
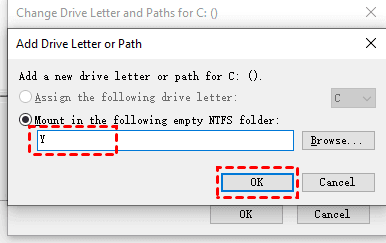
3. Choose Add, then Enter Y for the drive letter, and finally click OK.
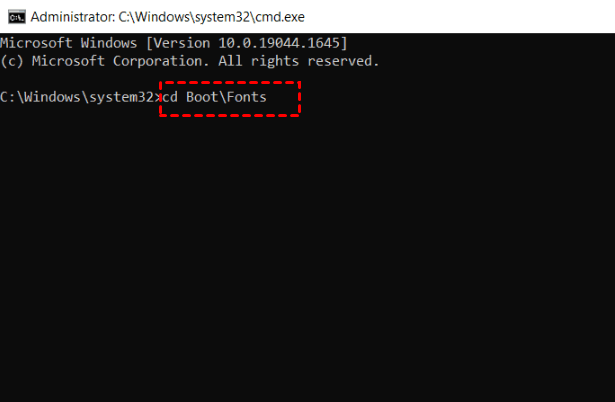
4. Search for cmd from the Start menu, right-click Command Prompt from the search list, and select Run as administrator.
5. In the command prompt, type Y: and hit Enter to switch to that drive. Then, navigate to the Fonts folder by typing cd Boot\Fonts.
6. Type each of the following commands and press Enter after each one:
▸takeown /d y /r /f (You have to include the space and the period after the “f”)
▸icacls Y:\* /save %systemdrive%\NTFSp.txt /c /t (Save the permission to the drive)
▸whoami (To display the name of the current user account)
▸icacls . /grant :F /t (Do not put a space between the username and “:F”)
▸del *.* (Delete all files in the folder)
▸icacls Y:\ /restore %systemdrive%\NTFSp.txt /c /t (To restore permissions)
▸icacls . /grant system:f /t (Revert the access control list (ACL) to the system)
▸icacls Y: /setowner “SYSTEM” /t /c (Return ownership of the drive to the system)
7. If you want to remove the Y drive letter, right-click the System Reserved Partition in the Disk Management tool and select Change Drive Letter and Path just like you did within the solution. But this time, choose the Y: drive, and select Remove, then click OK to save the changes.
8. Now, the error We couldn’t update System Reserved Partition in Windows 11 should have been successfully resolved. You can use the free space of System Reserved Partitions to upgrade or update your operating system.
Steps for Windows 10/11 with GPT partition
If your partition style is GPT, you can follow the steps below to solve this issue.
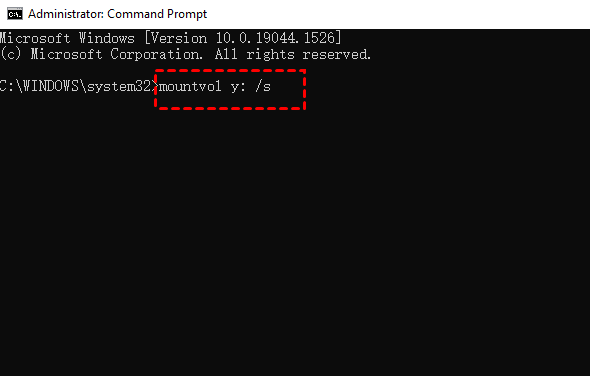
1. Type cmd in the search box. Select Command Prompt from the list, and select Run as administrator.
2. In command prompt window, type mountvol y: /s and then hit Enter. This will add the Y: drive letter to access the System Partition.
3. Type Y: and press Enter to switch to Y drive. Then, navigate to the Fonts folder by typing cd EFI\Microsoft\Boot\Fonts. Type del *.* to delete font files. It may ask you if you are sure to continue, press Y and then Enter to continue.
Bonus tip: restore the system image backup once needed
If you typed the wrong command while performing the above repair steps and your computer fell into an unbootable state, then you can restore your computer using the system image backup you created earlier with the help of AOMEI Backupper.
Run AOMEI Backupper Standard, click Restore > Select Task, or Select Image File. Then, follow the wizard to complete the system recovery process.

In the end
If you get stuck in the error "We couldn't update System Reserved Partition in Windows 11," you can read this post for the best solutions. But you should be alert that when performing system-related setups, incorrect steps may cause the system to fail to boot or lose important data. Therefore, when you try the above fixes, it is highly recommended that you create a backup of your computer in advance using the best free backup software - AOMEI Backupper so that you can recover your PC in case of unavoidable situations.
Moreover, you can utilize this freeware to make Windows 11 boot from USB in case you want to try the latest release Windows 11 version or the operating system just won't boot properly.