How to Create Restore Point in Windows 7 (2 Ways)
If you don't know how to create a system restore point in Windows 7, continue to read below and learn 2 practical methods as well as how to use it.
By Ivy Updated on October 31, 2024
What is a system restore point?
The system restore point is a copy of your computer state including system files, Windows Registry, local user profiles, and system settings. By default, it is enabled in Windows 7 and it will create a restore point automatically when you install programs, drivers, Windows Updates, etc.
Also, Windows 7 will create a system restore point automatically if no other restore points exist in 7 days. Once your computer stops responding or runs slowly, you can use it to recover computer to an earlier date.
✎ Where are Windows 7 Restore Points?
The restore points will be saved on the volume that you are protecting. Please note the system restore point gone if the volume is corrupted.
✎ Can I create my own restore point?
You can easily create a system restore point in Windows 7 manually at any time. If the disk free space on the volume is too low for System Restore to operate, it will automatically disable itself.
How to create a system restore point in Windows 7
Here you will learn 2 effective ways to create system restore point in Windows 7, namely using System Restore and Windows Task Scheduler. The previous one requires human intervention while the second one is a set-and-forget method. Select them based on your needs.
1. Windows 7 creates a restore point (using System Restore)
1. Open System Restore. You have 2 methods in the following:
- From Start: Click Start, type create a restore point in the search box and select it.
- From Control Panel: Click Start > Control Panel >System and Security, select System and System Protection.
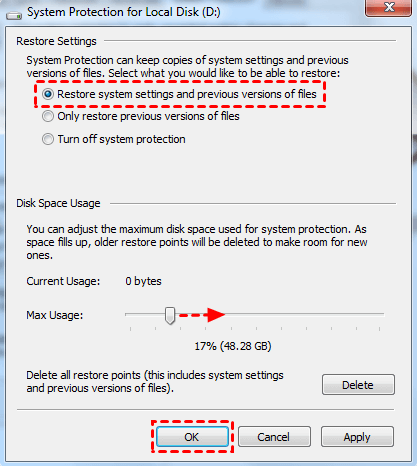
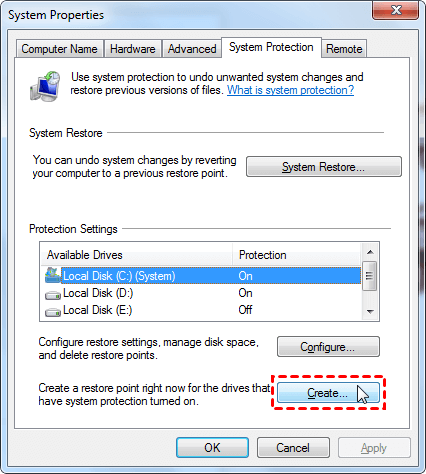
2. Select System Protection and select the drive you want to create a restore point in Windows 7, C: drive, for example. Click Configure to set restore settings, disk space, or delete restore points and Apply > OK.
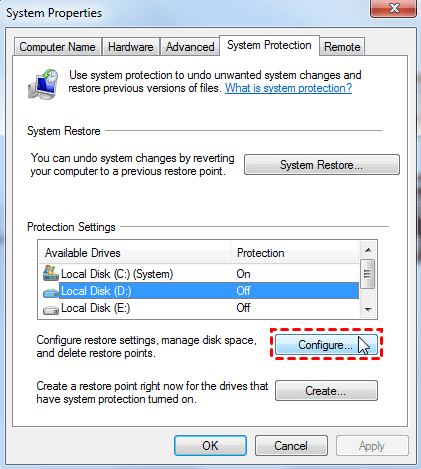
Here are 3 options in the following window.
- Restore Settings: Select what you want to restore, both system settings and previous versions of files, or only previous versions of files.
- Disk Space Usage: By default, the max usage is 10% if you don't change it.
- Delete all restore points: If the restore points occupy a lot of space, you can delete them to free up more space.
3. After configuring system restore point, click Create...to create system restore point in Windows 7.
4. A pop window will appear and you can type a description to help you identify the restore point. Finally, click Create to confirm.
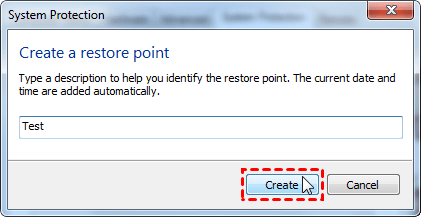
5. Once the process is completed, you will see the restore point was created successfully message.
2. Create Windows 7 Restore Point (using Task Scheduler)
Instead of creating a restore point manually, you can also use Windows Task Scheduler to automatically create system restore point in Windows 7 on a scheduled time or event. For example, to create system restore point in Windows 7 at startup:
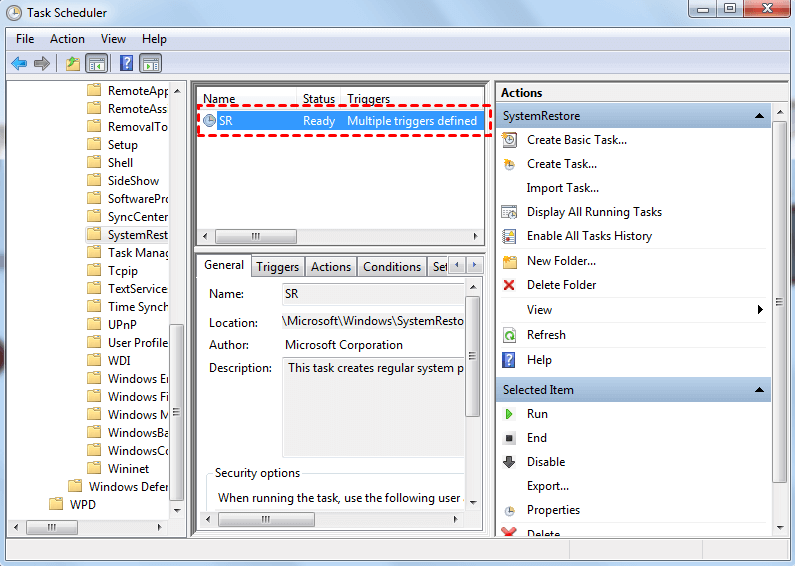
1. Click Start, type Task Scheduler in the search box, and hit Enter.
2. On the left panel, navigate to Task Scheduler Library > Microsoft > Windows > SystemRestore.
3. Double-click on the task named SR to edit it.
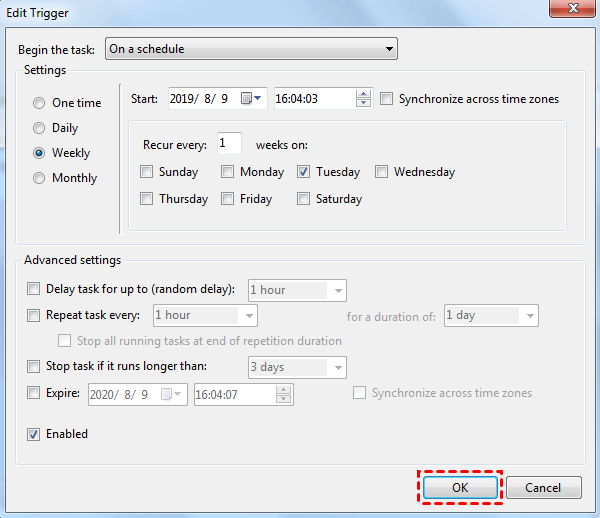
4. Under the Triggers tab, you can click New to add a new trigger at Startup. Or just click Edit to change the trigger.
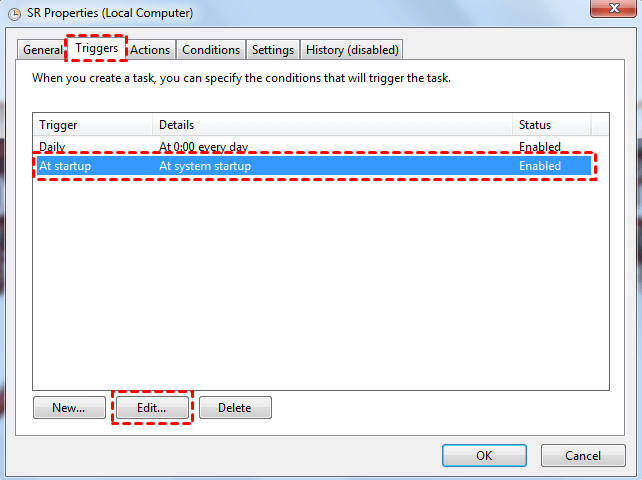
5. Set the scheduled time to perform the task and click OK to confirm.
Now, a new system restore point will be created automatically at your preferred schedule and intervals.
How to Perform system Restore in Windows 7/8/10/11
When your system gets corrupted or something else goes wrong, you can use system restore point to restore the system to a previous good state. Two ways are available.
- Restore a system point within Windows.
- Restore a system point in safe mode (If your Windows is not bootable).
1. Restore Windows from a restore point within Windows
1. Open the System Properties windows. Scroll down and click the System Restore button.
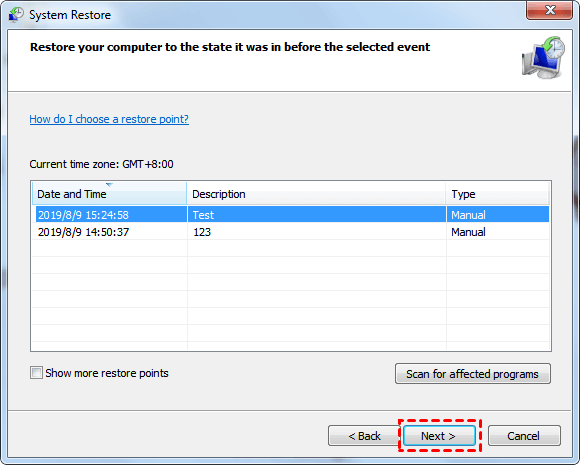
2. A window will appear, confirm the restore point in Recommended restore is working fine, and click Next.
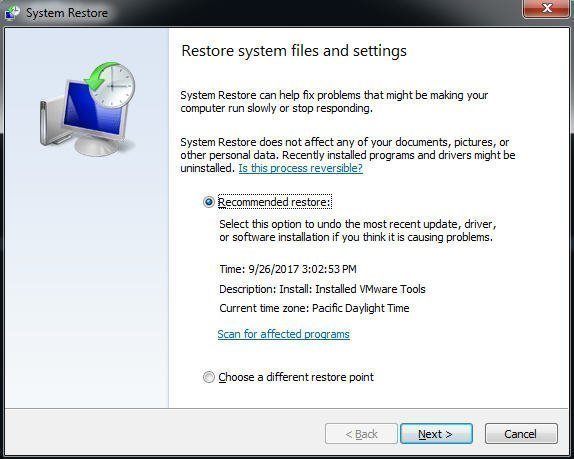
3. If not, tick Choose a different restore point. It will list all the recent restore points and the most recent option is selected. Click Next and Finish to start the restore.
Notes:
- You can click Show more restore points to see more.
- If you are not sure whether the restore will cause some of your programs to lose data, you can click Scan for affected programs to check.
2. Restore a system Point in Safe Mode
If you cannot access the Windows desktop, boot into safe mode and perform a system restore.
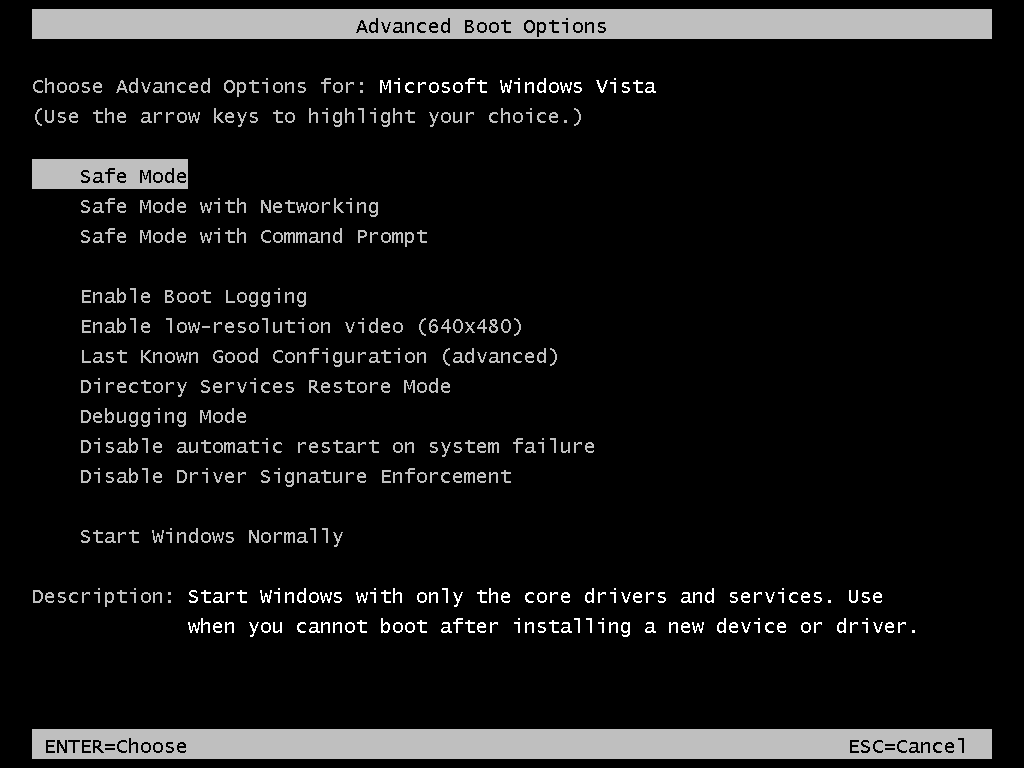
1. Start your computer, and press the F8 key repeatedly until you see the Windows logo.
2. At the Advanced Boot Options window, select Safe Mode with Command Prompt.
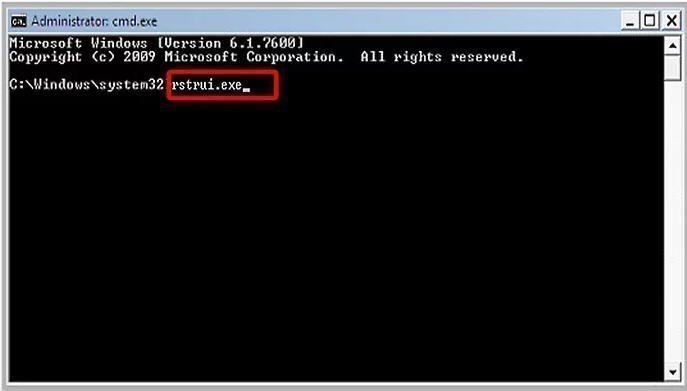
3. Type rstrui.exe in the command prompt window and press Enter.
4. Here you will see the System Restore window, tick Recommended restore, and click Next. Then, perform a system restore just like you are in Windows.
Some problems System Restore Points cannot fix
As mentioned, system restore will restore system files, drivers, registry settings, and installed software. So you may find:
- Some programs like antivirus tools may not work as they should after the restoration. You can also check the affected programs before performing a system restore.
- All the Windows updates installed after the restore point was taken will be uninstalled.
- You cannot use it to restore your personal files and other data, because this system restore utility does not backup them.
- It does not remove or clean viruses or malware like WannaCry or Petya, which is deeply infected with your operating system.
- You will be told no system restore point if the volume you are protecting is corrupted.
Therefore, you may want a deeper layer of protection, just think about it as a permanent restore point in Windows 7.
Up-to-date Restore Point in Windows to Protect Your PC
To protect your computer from serious issues like file system corruption, ransomware infection, hard drive failure, you should create a permanent restore point in Windows 7 with free backup software like AOMEI Backupper Standard.
It includes not only computer status, but also OS, personal data, etc. everything on the Windows 7 disk. So you can restore Windows 7 to new hard drive or SSD without downtime.
-
It offers 5 backup types: system backup, file backup, disk backup, file backup, and cloud backup.
-
It allows you to customize a scheduled backup task and run it automatically daily/weekly/monthly.
-
By default, it will create incremental backups to always keep your data backup updated without taking up much disk space.
-
You can always save a copy of the permanent restore point to new hard drive, SSD, network drive, NAS, cloud drive, etc.
-
You can choose to create Windows 7 recovery disk just in case it is not bootable.
Moreover, it has a clear interface, so intuitive to users, even a green hand can create a permanent restore point in Windows 7 easily.
Please download this free backup software to have a try! Windows 7, 8, 10, 11, XP and Vista are supported. For server users, try AOMEI Backupper Server!
1. Free install and run AOMEI Backupper. Then in the interface, click Backup > System backup.

2. System drive and other boot partition(s) are selected by default. Click the second box and select a local path, network or NAS, or cloud drive to save the image file.

3. Click Schedule Backup and select Daily, Weekly, or Monthly. Then, click Start Backup to create a permanent restore point in Windows 7.

Tips:
- Schedule Backup: The Event triggers and USB plug in are available in the Professional version or higher.
- Backup Scheme: Once you enable schedule backup, the incremental backup will be activated. You can also use the differential backup to save disk space or directly free up space with different automatic backup cleanup methods.
- Options: Click it to comment on this task, enable email notification, set compression level, or splitting method, etc.
✿ Universal ways to restore system in Windows 7:
- Restore within running Windows. If your system is bootable but not functional normally, you just need to open AOMEI Backupper and perform a system restore in it.
- Restore from the Windows recovery environment. If you integrate AOMEI Backupper into Windows recovery environment before your computer not working, you can restart your computer and access this software from it, then perform system restore in Windows 7.
- Restore from bootable CD or USB drive. If you create a bootable device, boot from it and restore system without booting into Windows.
- Restore Windows 7 from network. The AOMEI PXE Tool also hep you restore system in Windows 7. Unlike other methods, you can start this computer over network from another working machine.
✿ The advanced way to protect your computer:
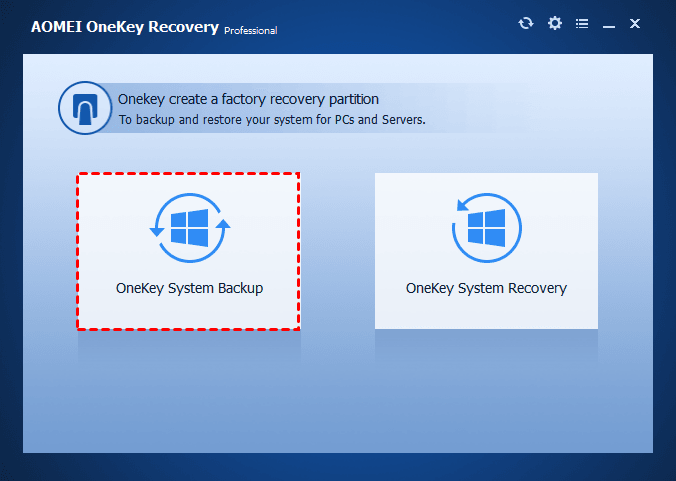
Instead of create system image backup and bootable media one by one, you can choose to use onekey recovery software AOMEI OneKey Recovery. It can complete these tasks simultaneously and store the boot files and system image into a created recovery partition during the backup process.
It adds boot menu as well and allows you press a specific key (eg: F11 or A ) to access it and then restore system image without booting into Winodws.
Conclusion
You can easily create a restore point in Windows 7 with the above methods and perform a system restore in the event of installed programs, drivers, system files, or settings go wrong.
But there are some problems system restore point cannot fix, such as data loss. In view of this, it's suggested to create a permanent restore point instead of computer status. So you can recover your computer at any time.