Guide | Windows 7/8/10/11 System Image Backup and Restore
What is Windows 7 system image? How to perform system image backup and recovery in Windows 7/8/10? This is a complete guide to help you understand it better and do it successfully.
Quick Navigation:
About Windows 7 System Image Backup and Restore
A system image is a copy of the drives required for Windows 7/8/10 to run. Additional drives can also be included. That is to say, you can basically create a system image backup of your hard drive with all the data, and restore it via System Image Recovery when the computer breaks down.
The function of system image backup and restore was firstly introduced in Windows 7 and has been adopted by Windows 8/8.1/10. Even in the latest OS, you can create a system image in Backup and Restore (Windows 7).
Different from other Windows built-in backup utilities, it's not designed to backup individual items. If you just want to backup some files or folders, a system image may not be the appropriate choice. But if you are going to back up the operating system or the entire hard drive, you can follow this guide to accomplish it.
How to Create a System Image in Windows 7/8/10/11
To create system image in Windows 7 as well as Windows 8, 10, 11, you can use the built-in system image backup tools. The general approaches are as below:
Windows 7: Start > Control Panel > System and Security > Back up your computer
Windows 8/8.1: Start > Control Panel > System and Security > File History > System Image Backup
Windows 10: Start > Settings > Update & Security > Backup > Go to Backup and Restore (Windows 7)
Windows 11: Start > Settings > System > Storage > Advanced storage settings > Backup options > Go to Backup and Restore (Windows 7)
Alternatively, you can search for “backup settings” in Start menu or on task bar directly. And the following steps to perform system image backup in Windows 11/10/8/7 are largely similar. I'll give an example based on Windows 7.
How to create a system image in Windows 7:
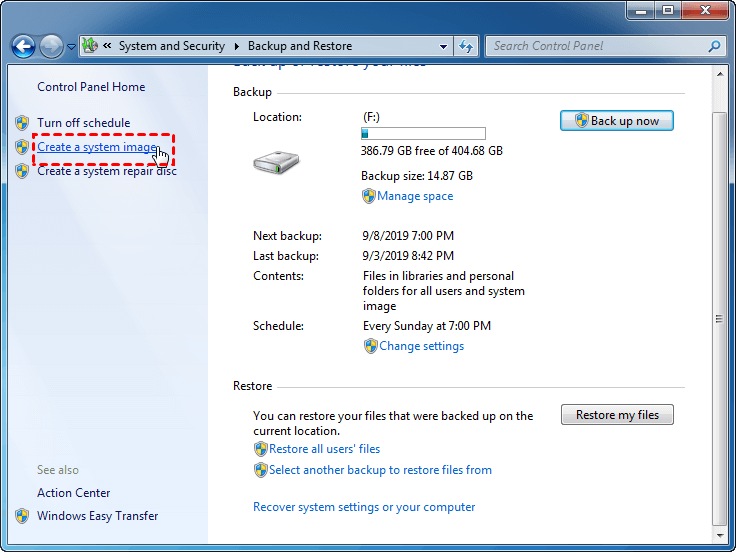
1. Click Create a system image on the left-top corner of Backup and Restore.
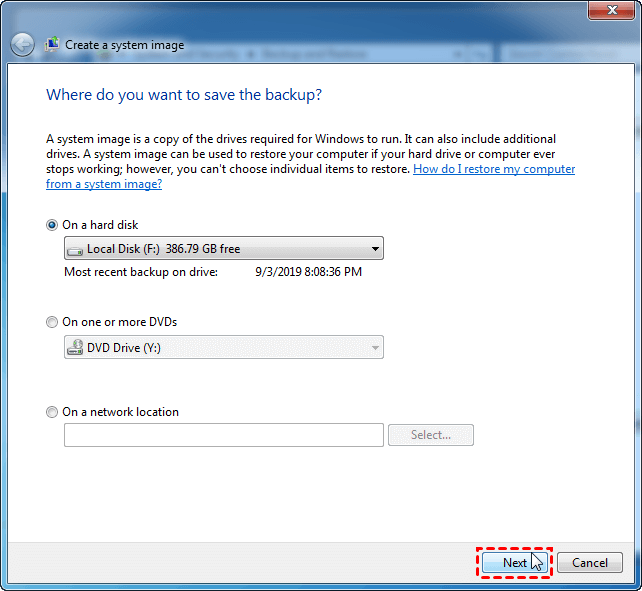
2. Choose a destination to store the system image and click Next.
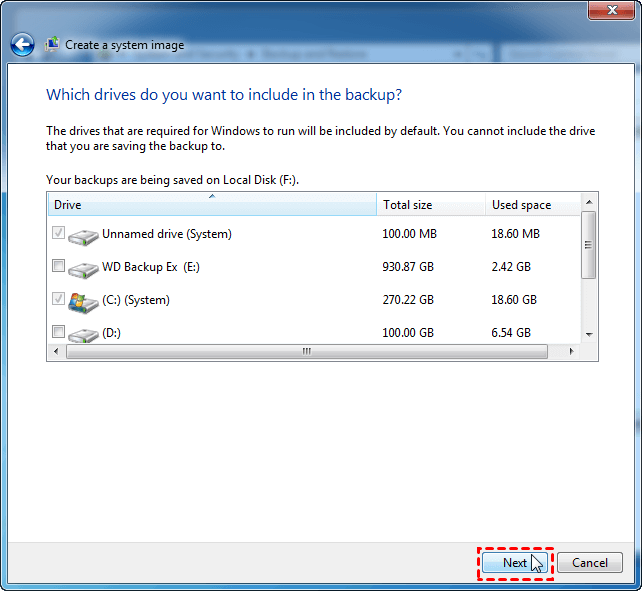
3. Select which drives to backup to the system image. The system required drives will be selected automatically. You can include additional drives as you like. Then click Next to continue.
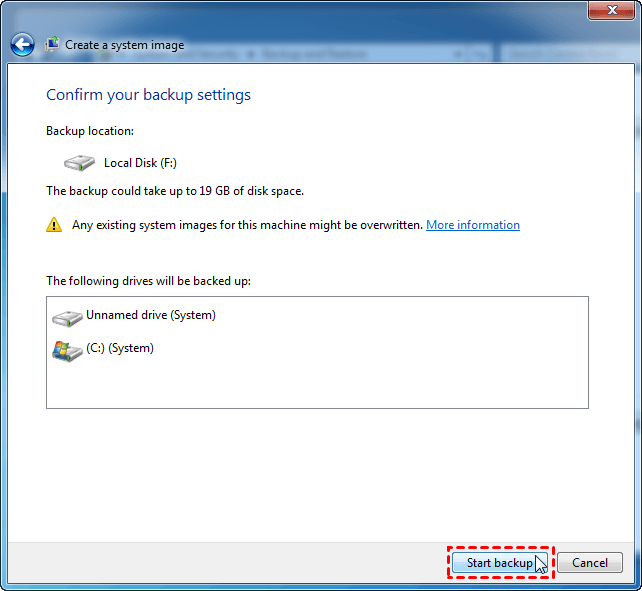
4. Confirm your backup settings and click Start backup. It may take a while to complete the process, depending on the size or the data to be imaged and the speed of your computer, etc.
How to Perform System Image Recovery in Windows 7/8/10/11
After you’ve successfully created a system image with built-in Backup and Restore, the remaining question is when and how to use it.
As stated, a system image is used for System Image Recovery when your hard drive or computer ever stops working. To make use of it, you need to access advanced startup options, and find the option to restore system image.
How to get access to System Image Recovery in Windows 7:
Make sure whether your computer includes preinstalled recovery options. If yes, press F8 during startup and choose Repair your computer in Windows 7 advanced boot options.
If you don’t have the option, then insert a Windows 7 installation disc, change the boot order if needed, click Next in Install Windows, and then choose Repair your computer.
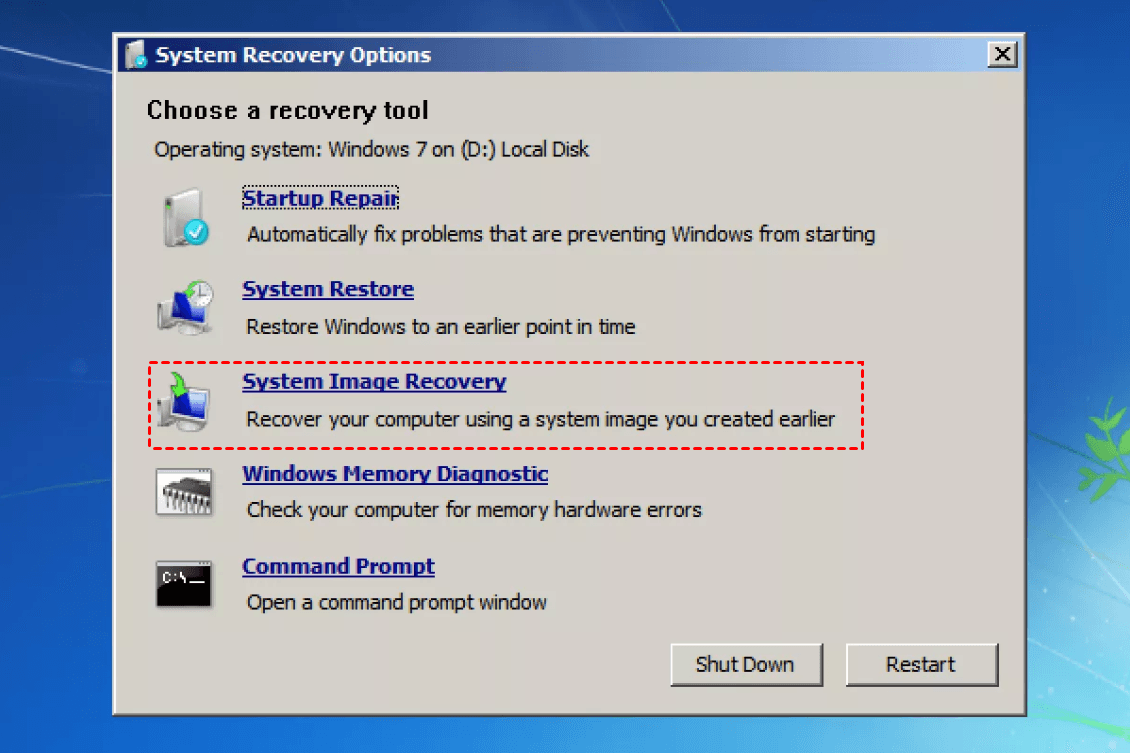
Finally, choose System Image Recovery in System Recovery options.
How to get access to System Image Recovery in Windows 8/8.1/10/11:
If you can still log on to Windows, then click Power button in Start menu, hold the Shift key and hit Restart to enter Windows Recovery Environment. If not, insert an installation disc, select the language and region in Windows Setup, click Next and then Repair your computer.
Alternatively, you can hold the power button to turn down the PC and then turn it on. Turn it down again when Windows logo appears and then turn it on. Repeat this process once more, and on the third-time boot, you’ll enter WinRE.
Then, click Troubleshoot > Advanced > System Image Recovery.
Tips: If you don’t have an installation CD, you can also create a recovery drive or repair disc to boot into advanced options.
Here I’ll show you the process to perform Windows 7 system image restore. The steps in Windows 8 and Windows 10/11 are almost the same.
How to restore Windows 7 from system image backup:
1. Get into the recovery environment and choose System Image Recovery with above methods. If you backed up the system image to a removable device like external hard drive or USB, connect it first.
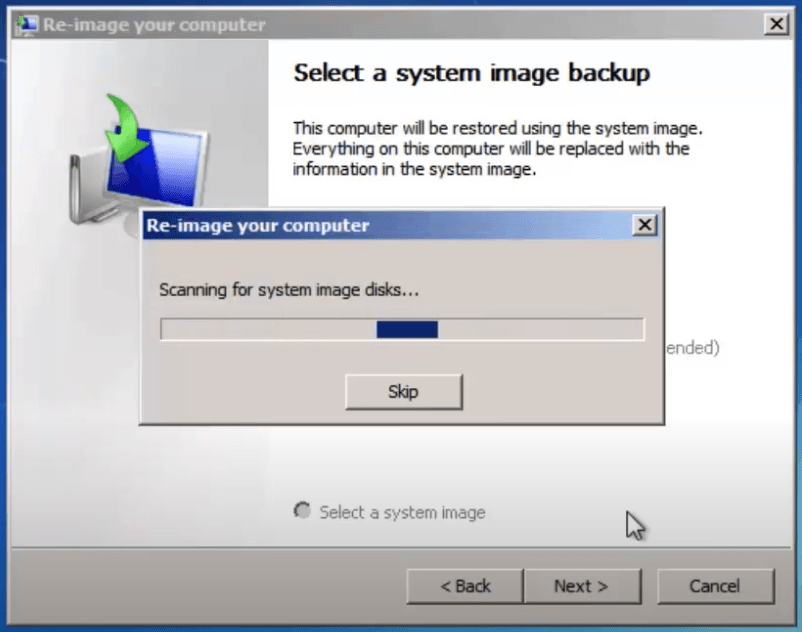
2. It shall automatically select the available system image stores on your device, or you can choose Select a system image to locate it on a CD/DVD or network. Click Next to continue.
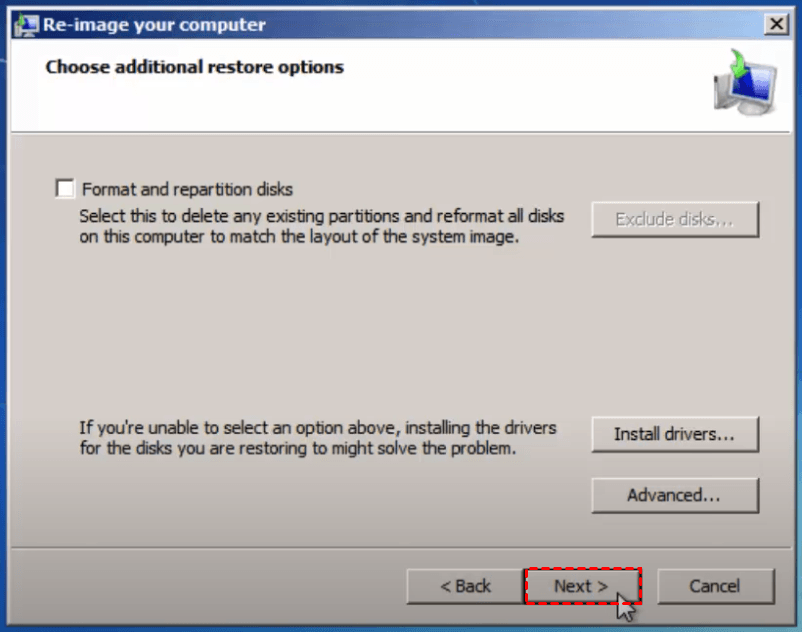
3. Choose additional restore options and click Next.
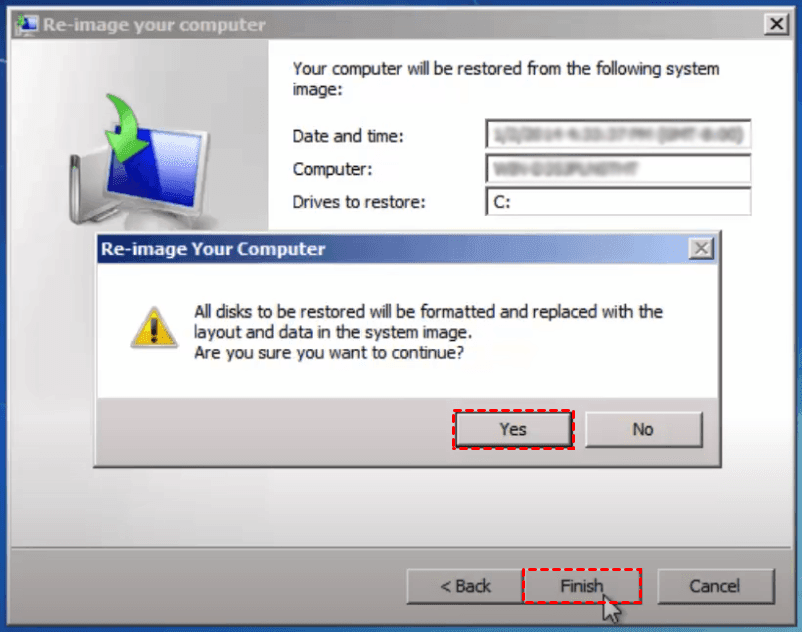
4. Confirm the information. Click Finish and then Yes if there’s no problem. It may take hours to restore the system image, please wait patiently.
Free Alternative to Windows System Image Backup and Restore
System image backup and recovery can be performed with Windows 7/8/10/11 built-in utility. However, it doesn’t always work due to various reasons. You may end up failing with an unexpected error message.
Even if it works, the backup and restore speed is relatively slow, and the backed up system image could take up a huge space (over 100 GB in severe cases).
In this case, an easy alternative with high success rate like AOMEI Backupper Standard might serve you better.
◆ It’s FREE to use, and enables you to backup and restore system in Windows 11/10/8.1/8/7/Vista/XP.
◆ It allows you to create restorable image for not only operating system, but also files, partitions or the entire disk.
◆ The process of backup and restore is rather simple and running in a satisfactory speed.
◆ You can schedule auto backup, and perform incremental or differential backup to saved only changed files.
◆ There’s a practical tool to help you create bootable media and rescue faulty computer.
Download the freeware to have a try:
How to create Windows 7 system image backup with AOMEI Backupper
1. Install and launch the software, go to Backup tab and choose System Backup.
2. The system partitions will be automatically selected, you can select a destination like local disk, external hard drive, USB, cloud drive, NAS, etc.
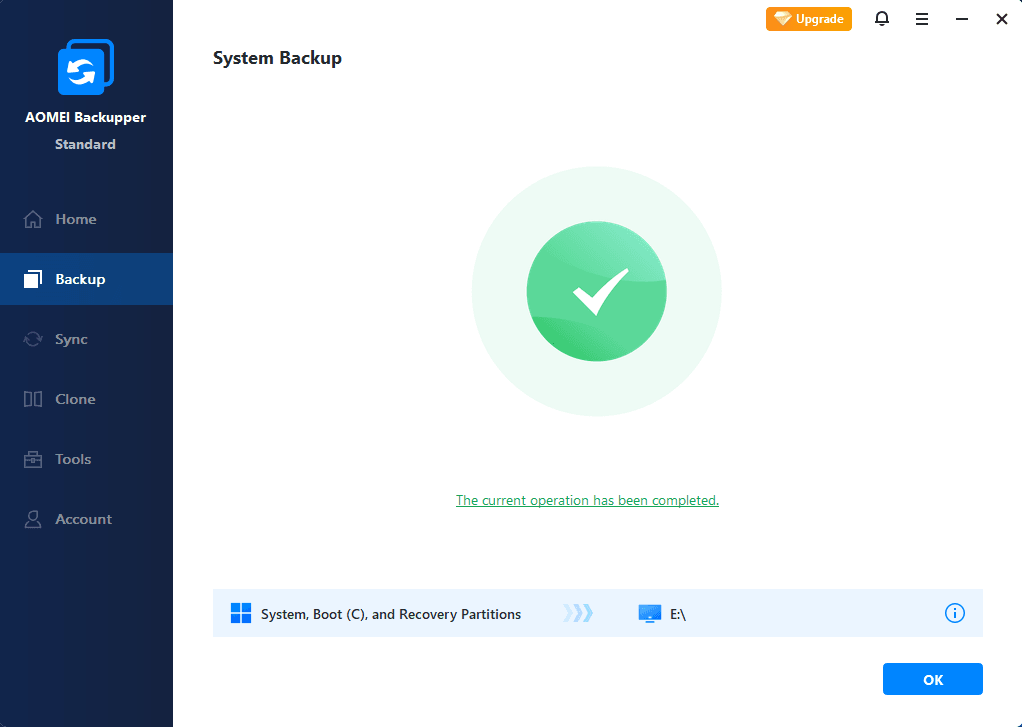
3. Optionally, you can customize the backup by Options, Schedule or Scheme. Click Start Backup to execute the task and wait for it to complete.
Schedule Backup: create automatic backup on basis of Daily/Weekly/Monthly. If you upgrade to Professional edition, you could enjoy two more options Event triggers and USB plug in.
Backup Scheme: auto delete older backups according the backup scheme you set. It’s available in advanced editions.
How to perform Windows 7 system image restore with AOMEI Backupper
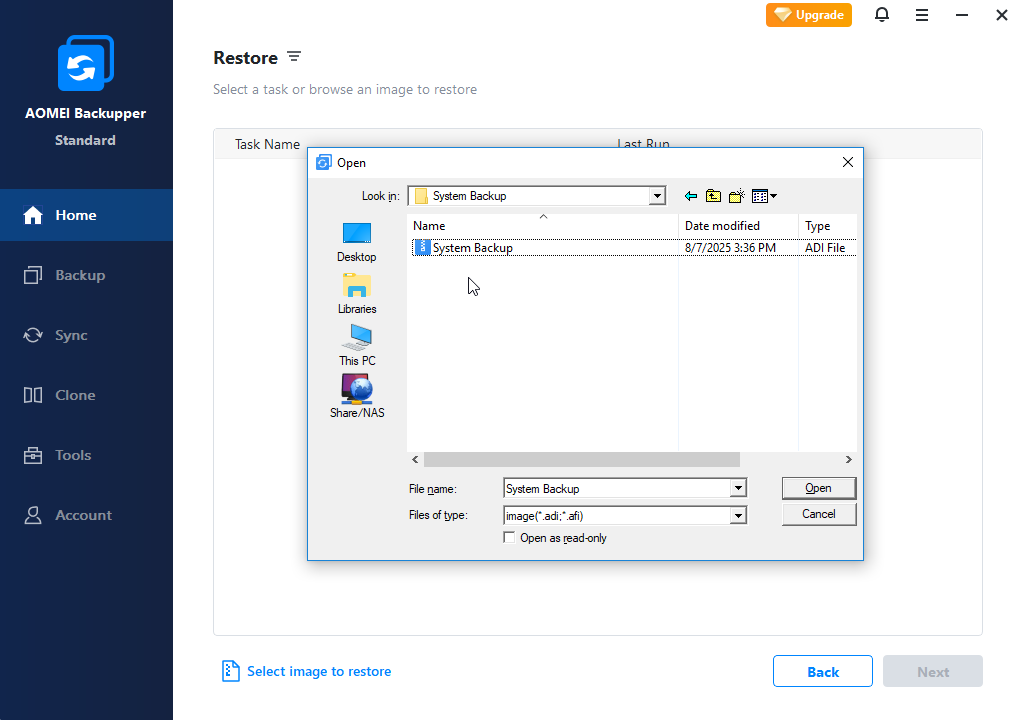
1. Switch to Restore tab, choose Select Task or Select Image File.
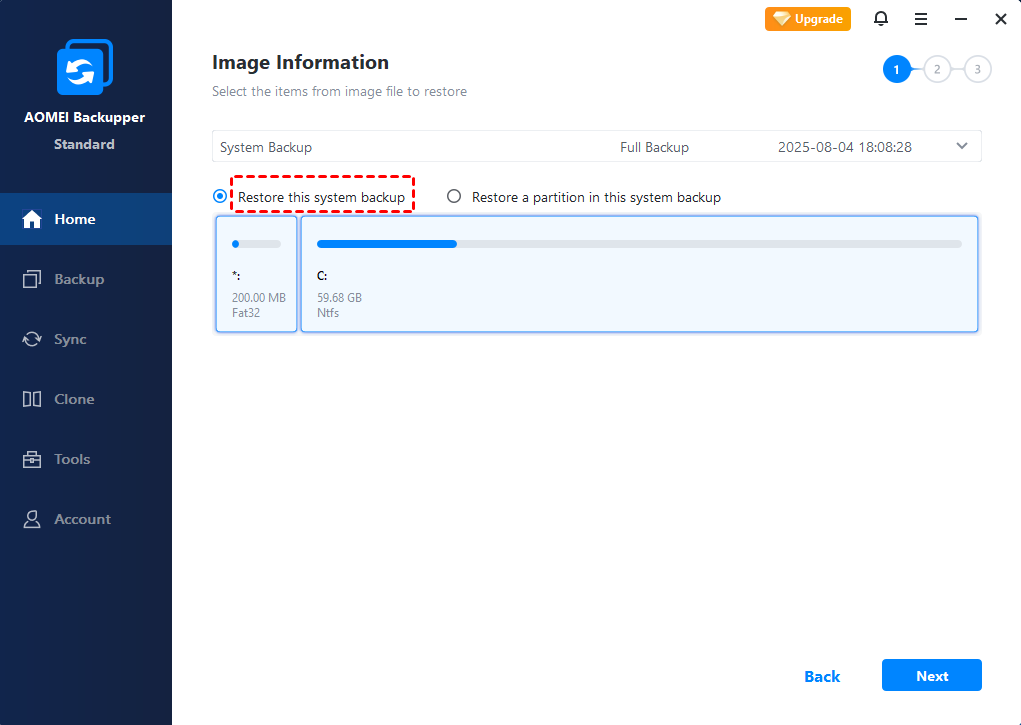
2. Select the task or system image and choose Restore this system backup, then click Next.
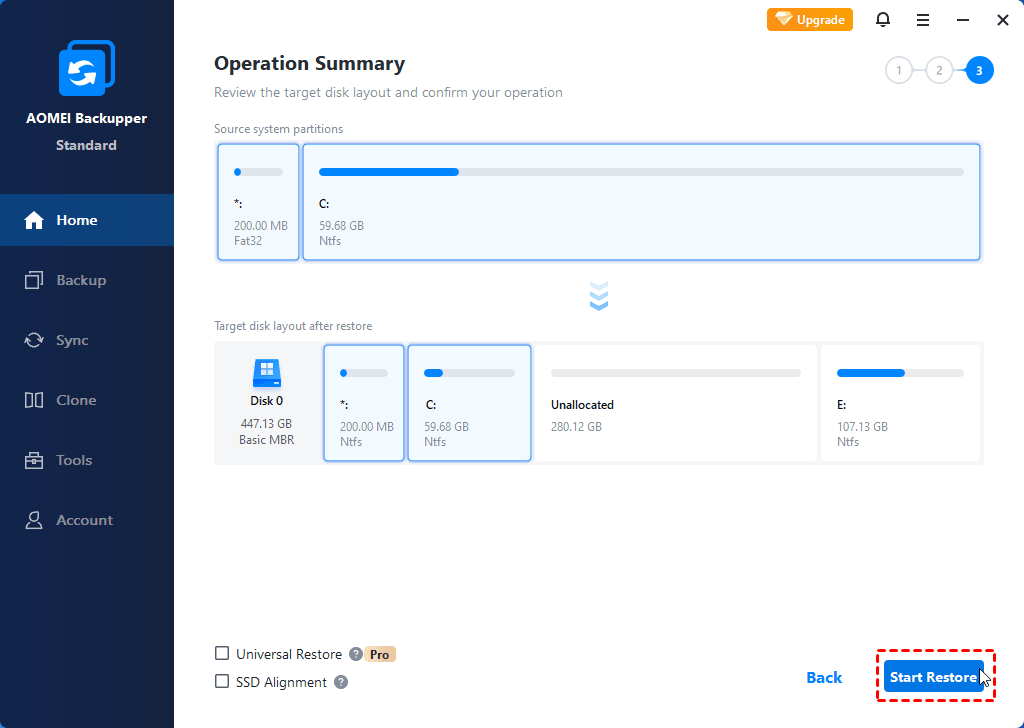
3. Confirm the operation and click Start Restore for system recovery.
- If you are worried that the computer won't boot due to unexpected problems, you can create bootable media with AOMEI Backupper, and use it to boot your faulty computer into WinPE and perform system image recovery with previously created backup.
- If what you want to backup is not only the operating system but the entire hard drive, you can choose Disk Backup instead.
- If you want to restore system image to dissimilar hardware, you could upgrade to Pro edition and tick Universal Restore during system restore.
Frequently Asked Questions about Windows 7 System Image
Q: What’s the difference between a system image and a restore point?
A: System image is a copy of all the data in system required drives for System Image Recovery, while system restore point is actually not a backup but a snapshot of Windows settings and configurations that can be used for System Restore.
Q: How’s system image different from ordinary backup?
A: System image is a backup for operating system or even the hard drive. In Windows 8/10/11, you can use File History to back up personal files to external hard drive, or use Set up backup in Backup and Restore to back up whatever folders & libraries you want. But a system image is specially designed for system partitions along with all the settings, files and programs, you cannot use it to backup or restore a single item.
Q: I already backed up my important files, do I need to create a system image?
A: It's up to you. But remember Windows is complex and therefore prone to various problems. If you encounter a system failure that can’t be solved by conventional methods, the last resort is to restore it to a normal state with a previously created system image.
Q: Can I create a system image on an USB flash drive?
A: Yes, you can do it either in Windows system image backup or AOMEI Backupper. If you fail to do it with built-in utilities, you can refer to can’t backup system to USB drive.
Q: Can I restore Windows 7 system image to another computer?
A: You can try, but it might not work since each Windows installation customizes itself to work with a particular PC. If you really want to do it, the Universal Restore feature of AOMEI Backupper may help you better. Also, an OEM license is bound to the motherboard and therefore cannot be transferred to different hardware.
Conclusion
Windows 7 system image backup and restore enables you to recover the computer from a serious malfunction. Even in Windows 8 and Windows 10, you can use built-in tools to fulfill the purpose. But if you find the operation complicated, or fail to complete the process, you could consider an easy and effective software, AOMEI Backupper.
It’s not only the alternative to system image backup and restore, but also an all-around data protection & disaster recovery solution for various cases. Even when you want to replace the hard drive, you can use AOMEI Backupper to migrate Windows system without reinstalling. As for image backup in Windows Server, there's also an edition for server backup and restore.
