How to Create Windows Server 2016 Recovery Disk (2 Ways)
Want to create a Windows Server 2016/2016 R2 recovery disk? Follow this article and I will show you two ways to create a recovery disk for your Windows Server.
By Lily Updated on December 14, 2023
Why need to create Windows Server 2016 recovery disk
Generally speaking, what situations do you need to create Windows Server 2016 recovery disk?
When you buy a brand-name computer, it comes with installation disk and recovery disk. After a period of time, you find your computer works well and you throw away your installation disc and recovery disk because of space saving. Or you lost them after you move to a new place. Or maybe your computer does not have an installation disk and recovery disk.
Oops, something unexpected happened to your computer, like system crash, hard disk failure. You cannot boot your computer, and you didn’t do Windows Server 2016 system state backup before. What can you do?
In this case, you need to troubleshoot computer. Therefore, it is critical to have a media like installation disk and recovery disk. Next, I will introduce two ways to create Windows Server 2016 recovery disk.
👉 Create Windows Server 2016 recovery disk from ISO
👉 An easy way to create bootable recovery disk in Windows Server👍
👉 Supplement: Best enterprise data backup solution🔥
Create Windows Server 2016 recovery disk from ISO
When you download Windows Server 2016 from Microsoft, you have the option to download an ISO file, which integrates all the Windows installation files. You can then copy it to a DVD or USB drive to make a bootable media. Here's a quick guide:
Step 1. Prepare Windows Server 2016 ISO
You can download Windows Server 2016 ISO from the Evaluation Center or some other site.
Then, mount the ISO file and note down the mounted drive letter, assuming it is g:\.
Step 2. Make a copy of ISO file to USB or disc
Insert the media (USB flash drive, for example) you want to use as recovery disk. Make a backup if there's any important data on it, cause the creation process will overwrite everything on it.
Open CMD as administrator, then run th following commands (press Enter after each line):
list disk
select disk # (insert the disk number or the target USB)
clean
create partition primary
select partition 1
active
format fs=ntfs quick (change "ntfs" into "fat32" if you are creating UEFI bootable USB)
assign letter=# (any available letter, assuming it is h)
exit
Now this disk is ready, you can enter the following commands to create the Boot sector and fill it with info:
bootsect.exe /nt60 h:/ (the drive letter of your USB)
Then, copy all the contents from the mounted ISO into the USB, you can use xcopy command as below:
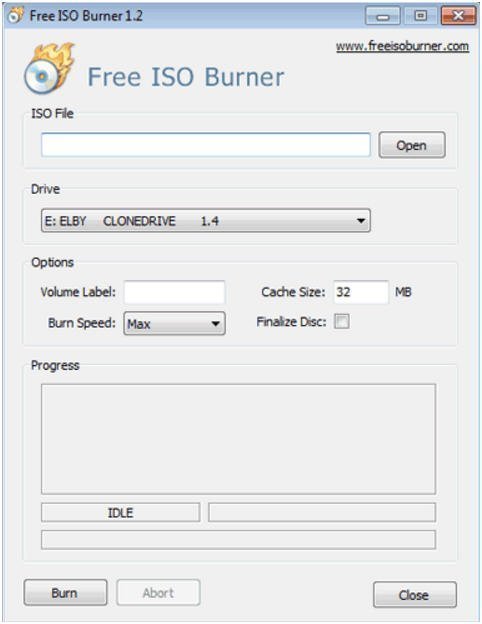
(Optional) Burn Bootable CD with FreeISOBurner
You can also create recovery disk with FreeISOBurner.
Download FreeISOBurn. Insert your CD-rom, and then launch FreeISOBurner, click "Open" button to add the ISO file, choose your disc (CD/DVD or Blu-ray Disk) in the drive section. Click "Burn" to burn the ISO file, after a while it will be completed.
Repair Windows Server 2016 with recovery disk
After you have created recovery disk, when your computer cannot boot, you can use recovery options to recover your computer. eg. use command prompt for advanced troubleshooting. Or use system image recovery.
If you want to recover Windows using a specific system image file, you still need a system image backup.
Suppose you have created a system image backup. Let’s see how to repair Windows Server 2008/2012/2016 with a recovery disk.
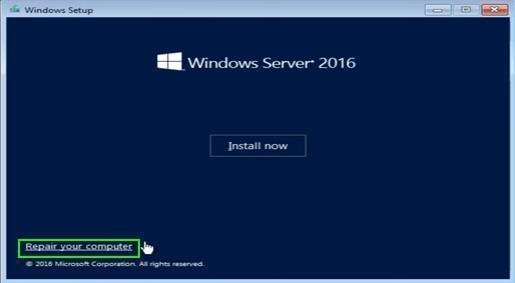
Step 1. Insert your USB bootable disk into the optical drive. Boot from USB bootable disk. Here comes the interface of Windows Setup screen, click Repair your computer at down left corner.
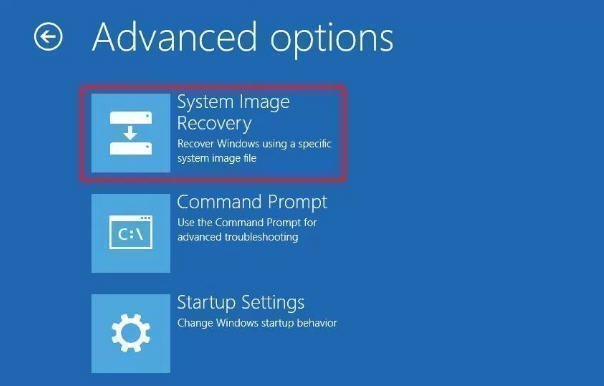
Step 2. Click Troubleshoot button, then choose System Image Recovery in the advanced options.
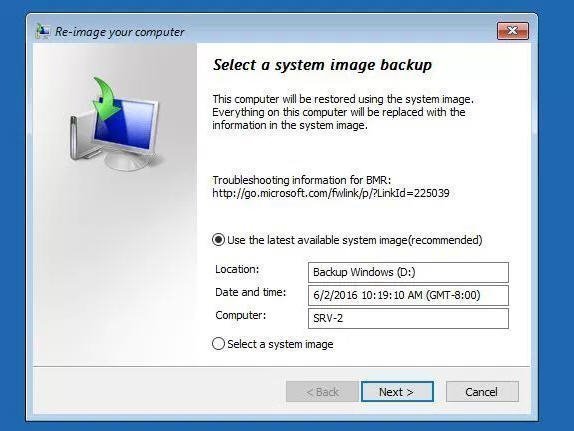
Step 3. Choose an account and enter the password if any. Then Re-image your computer will launch. There are two options you can choose: Use the latest available system image or Select a system image. Click one and click Next.
Step 4. Click Finish and then Yes at the final Re-image your computer confirmation. The restoration process will begin and could take from a few minutes to a few hours.
By the way, this method can be also used in creating Windows Server 2008 (R2)/2012 (R2) recovery disk.
However, the created recovery disk can only be used on the same operating system; that is, Server 2016 repair disk on Server 2016, Server 2008 recovery drive on Server 2008. If you want a recovery disk supporting different servers, you may try third party software.
An easy way to create bootable recovery disk in Windows Server
AOMEI Backupper Server is the best server backup software that owns multiple wonderful features.
- It allows you to create system state backup or full server backup. You can also backup individual files as per your need.
- It enables you to create bootable rescue media so as to restore system even if your hard drive dies completely.
- It offers the Universal Restore feature to help you restore system image to a different computer.
- It supports Windows Server 2003/2008/2012/2016/2019/2022.
With one Windows Server recovery disk, you can apply it to all the Windows Server operating systems. Let’s take a look at how to create a bootable recovery disk with AOMEI Backupper Server.
Step 1. Download AOMEI Backupper Server and open this software.
Step 2. Click Tools and select Create Bootable Media.

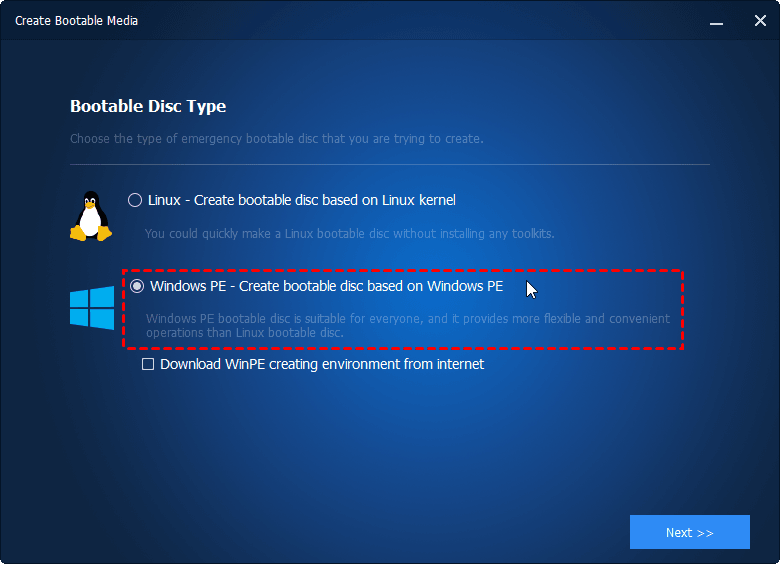
Step 3. Choose the type of emergency bootable disc that you are trying to create. It is recommended to create bootable disc based on Windows PE because it provides more flexible and convenient operations than Linux bootable disc, and enables you to boot from both legacy/MBR and UEFI/GPT modes.
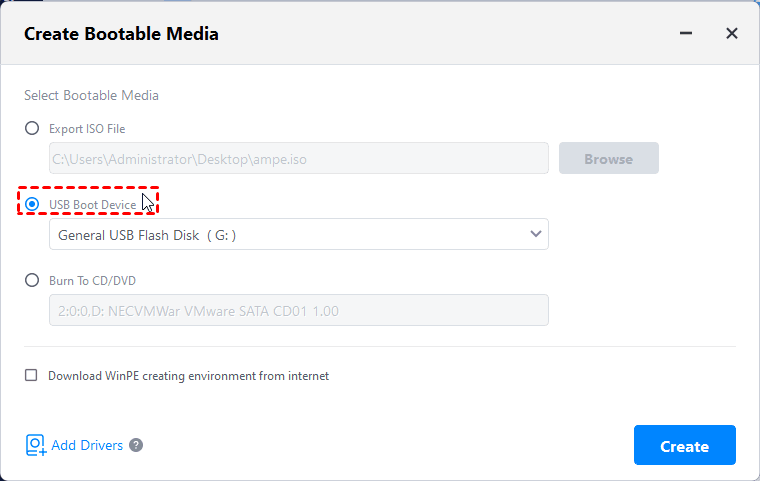
Step 4. Select a Bootable Media among Burn to CD/DVD, USB Boot Device, and Expert ISO file. Then click Next to run the pending process. Here take USB as an example.
It only takes you a few clicks and several minutes to create bootable media. After creating a USB bootable media, you may wonder how to recover Windows Server 2016. Let’s take a look at how to restore your Windows Server 2016.
Restore Windows Server 2016
Step 1. Insert your USB recovery disk into your Windows server 2016. Start your computer and press a specific key (usually Del or F2) to boot into BIOS. Switch the bootable media as the first boot option.
Step 2. After loading the main page of AOMEI Backupper, find the system backup task you created before in the Home tab. Expand its drop-down menu and select Restore.
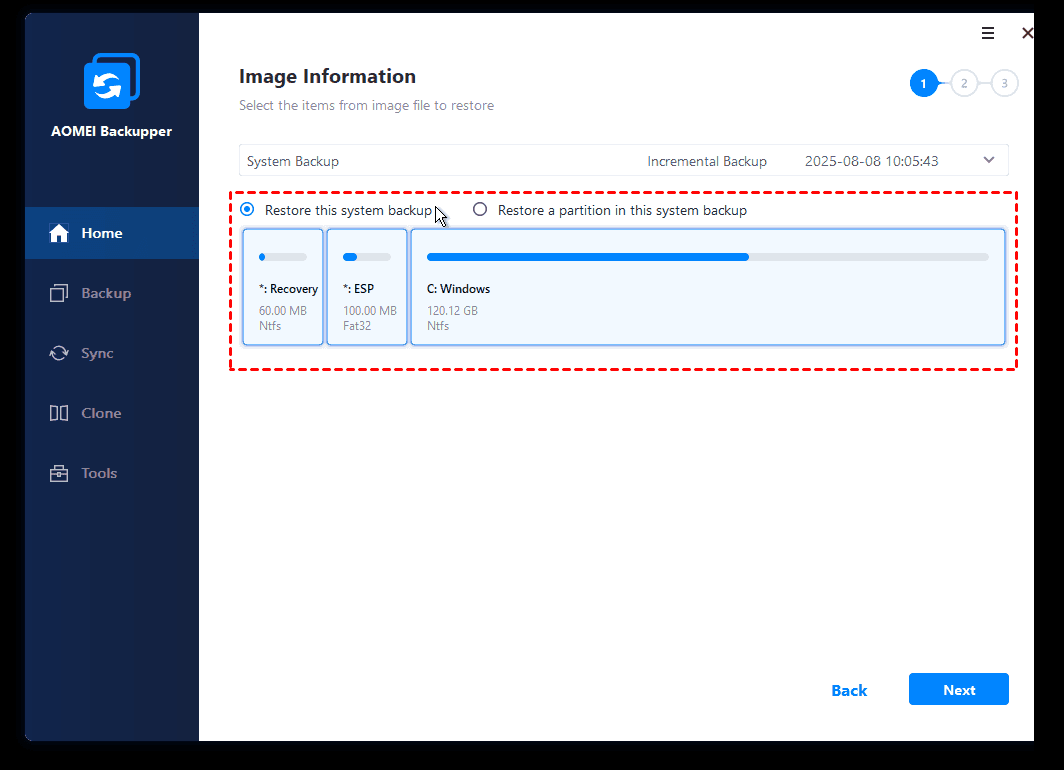
Step 3. In the next window, select Restore this system backup and click Next.
Step 4. Review your Source Partition and Destination Partition, then click Start Restore.
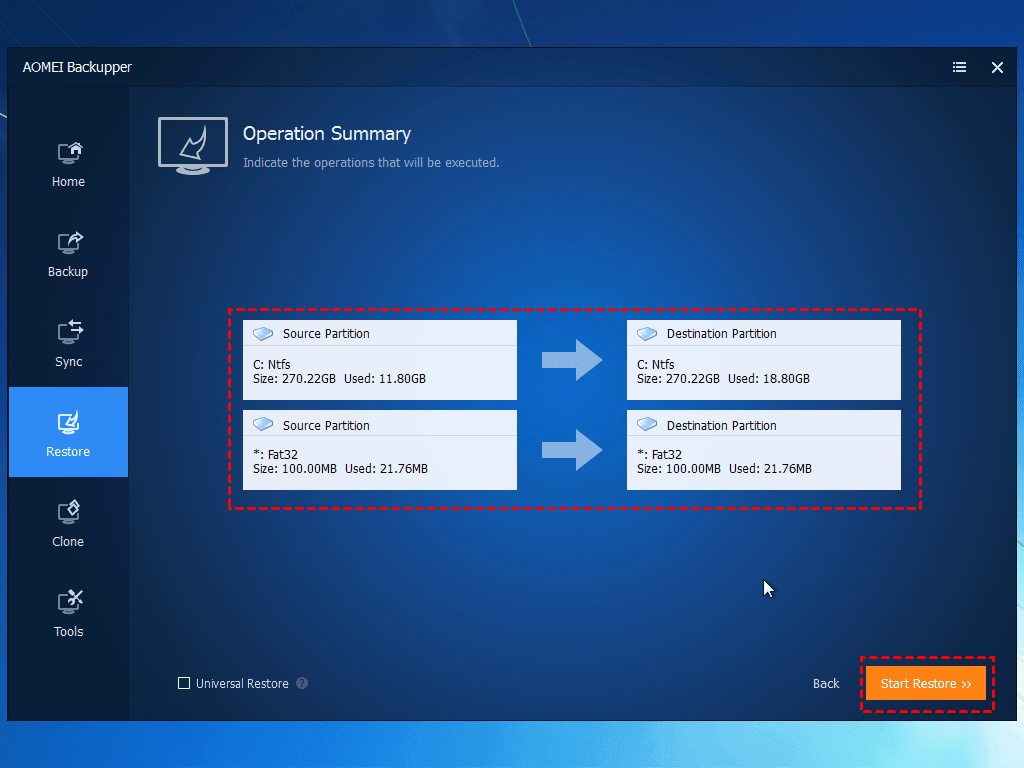
Tip: If you want to restore system to different hardware, you need to tick Universal Restore to ensure secure boot after restoration.
Supplement: Best enterprise data backup solution
If you are an enterprise user who has multiple Windows Server devices that need to be backed up, you can try the best enterprise backup software - AOMEI Cyber Backup. It offers you all-around enterprise data backup solutions:
- It enables you to create system/disk/partition backup for a bunch of Windows PCs and Servers, supporting Windows 11/10/8.1/8/7 and Windows Server 2022/2019/2016/2012 (R2)/2008 (R2).
- You are allowed to save backup images on a local disk, external hard drive, network share or NAS device, etc.
- You can schedule a backup task to run every day/week/month using the full/incremental/differential backup method.
Download this powerful enterprise backup software now to have a try!
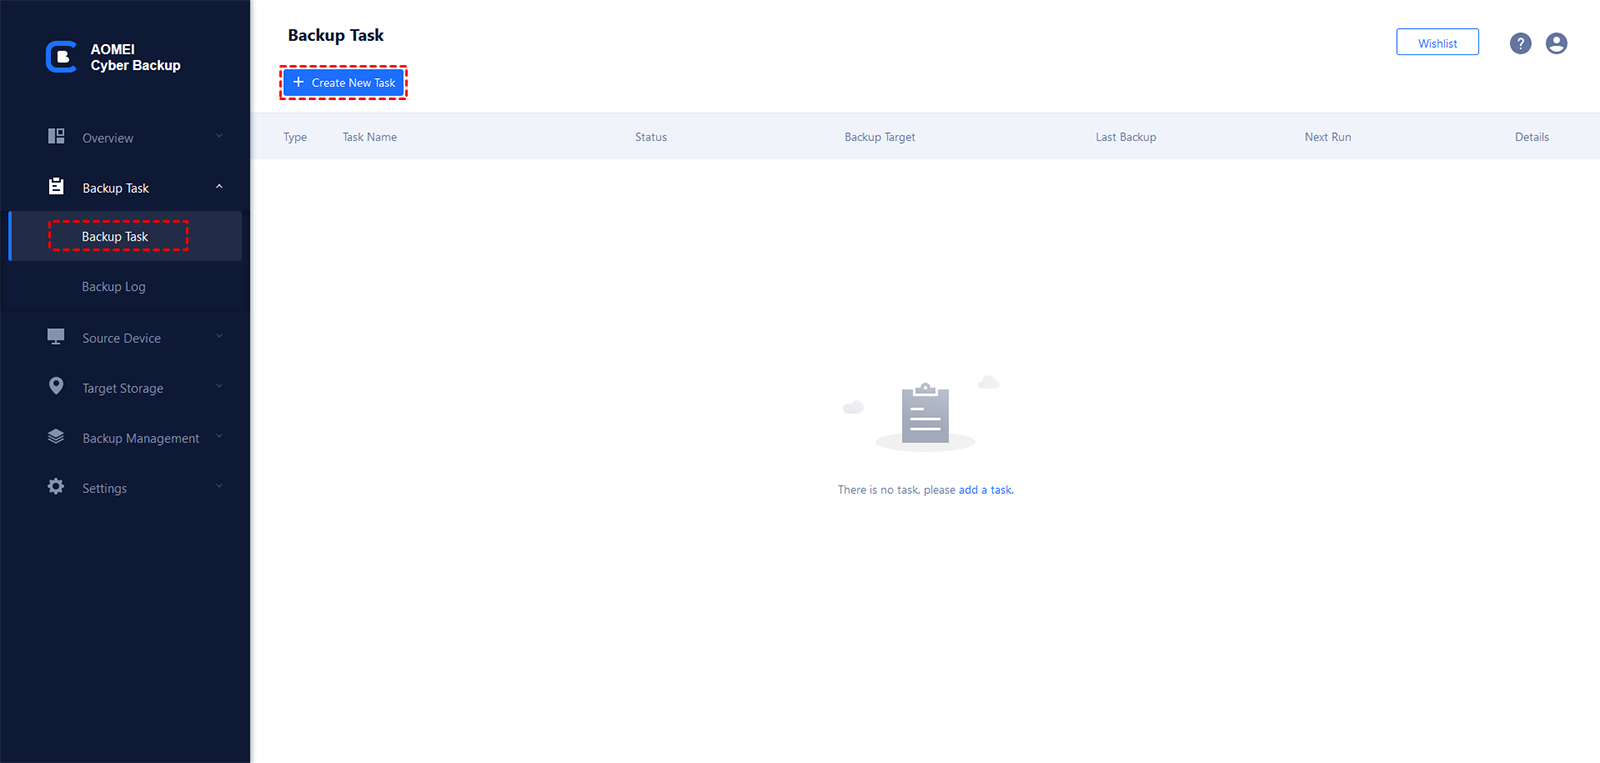
To make backups for client computers, just log in AOMEI Cyber Backup, and add the Windows device that you want to backup. Then click Backup Task on the left menu bar and select Backup Task > Create New Task.
Note: AOMEI Cyber Backup can not only help you backup physical machines but also virtual machines. It enables you to backup VMware and Hyper-V easily.
Conclusion
To protect system and data, creating Windows Server 2016 recovery disk is quite necessary. And with AOMEI Backupper, you can do this effortlessly. After creating a recovery disk, you can restore your computer even when it cannot boot.
To protect unlimited PCs and servers within your company, you may choose AOMEI Backupper Technician Plus. It offers unlimited billable technical services to clients. It also enables you to copy installation directory for portable version creation.