How to Fix Windows Server Black Screen after Login (3 Ways)
You can learn 3 top ways to fix Windows Server black screen after login and recommend backing up Windows Server to prevent irretrievable data loss.
By Miya Updated on November 28, 2024
Why does Windows Server black screen after login?
Upon logging in to your computer, you may be presented with a black screen and a cursor that is movable, or possibly nothing at all instead of your desktop. This issue is often associated with a malfunctioning or corrupted Windows Explorer process, as well as display drivers, third-party antivirus software, and Windows updates.
If you are able to access the Task Manager, restarting the process may offer a temporary solution. However, in some cases, Windows may become unresponsive and require some useful fixes.

Top 3 ways to fix Windows Server black screen after login
So, in this section, we will provide three top ways to help you fix Windows Server black screen after login.
1. Turn off Windows Audio Service
This fix is specifically for users who experience Windows Server 2019 black screen after login. These are the steps to implement this solution:
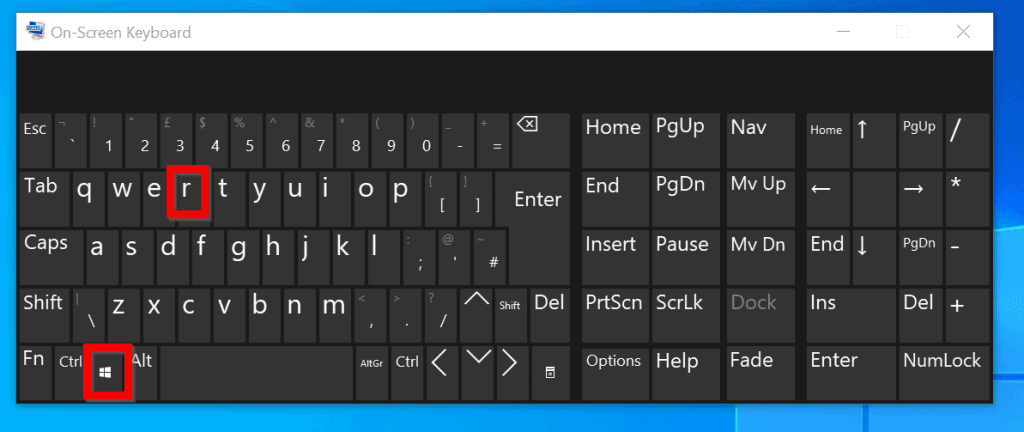
Step 1. Launch the On-Screen Keyboard on your computer and maximize its window.
Step 2. Establish an RDP connection to the server experiencing the black screen issue.
Step 3. Once connected, press the Windows + R key combination within the RDP session to open the Run command.
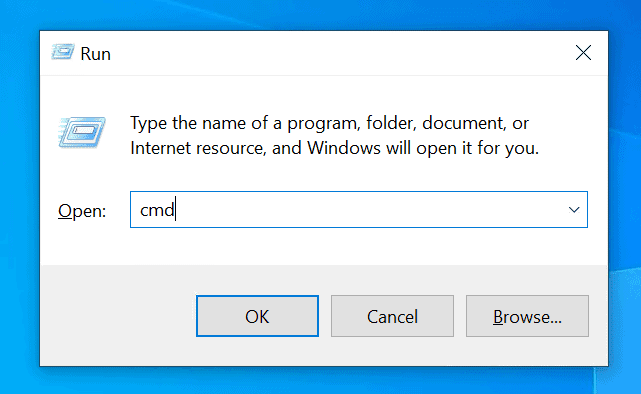
Step 4. Within the Run command, type cmd and then click on the OK button.
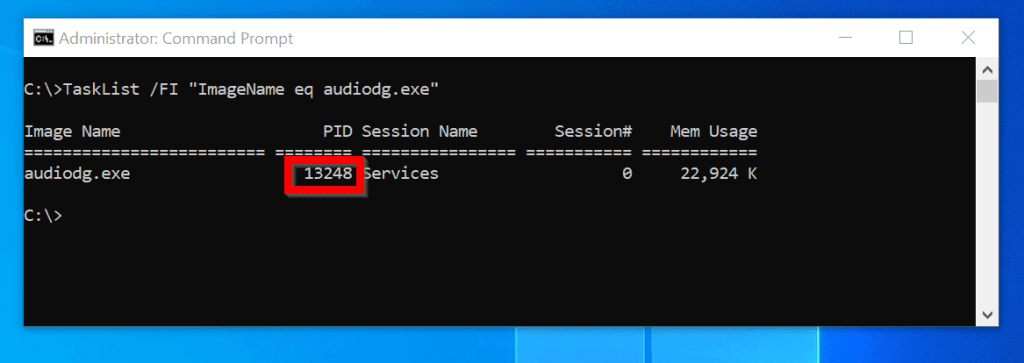
Step 5. Upon opening the Command Prompt, type the following command and press the Enter key:
▶ TASKLIST /FI "ImageName eq audiodg.exe"
Executing the command will generate a result for the "audiodg.exe" process, which should include its corresponding PID. Please take note of this PID.
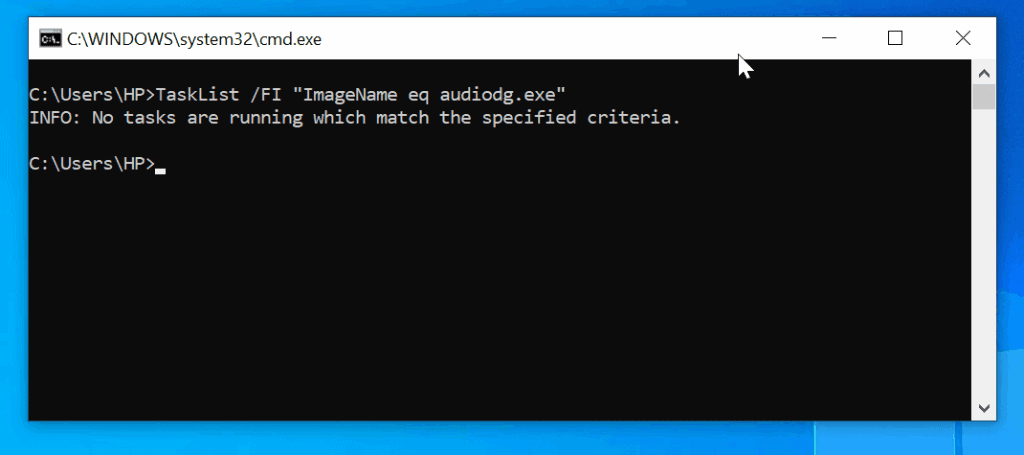
Tip: If you find that your situation matches this scenario, then you can skip the remaining steps in this section and proceed to the second fix.
Step 6. Execute the following command to terminate the Windows Audio Service:
▶ TASKKILL /PID
In my example, I will use the following command:
▶ TASKKILL /PID 13248
Tip: If you encounter an "access denied" error while executing the command, you can specify an alternative account with administrator privileges by using this command: TASKKILL /PID /U /P.
If you find that turning off Windows audio service does not fix the Windows Server 2016 black screen after login, please try the next fix.
2. Add "NT AUTHORITY\INTERACTIVE" Account to the Local "Users" Group
Several Windows Server users have successfully resolved the issue that Windows Server 2012 r2 black screen with cursor by adding the NT AUTHORITY\INTERACTIVE account to the local Users group. Here are steps:
Step 1. Opening the On-Screen Keyboard on your computer and maximizing its window.
Step 2. Establish an RDP connection with the server experiencing the black screen issue, and within the RDP session, press the Windows + R key combination to open the Run command.
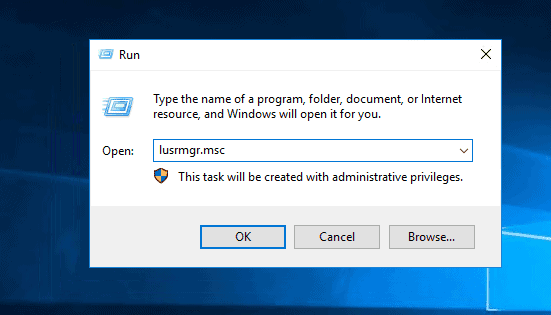
Step 3. In the Run command window, type "lusrmgr.msc" and click on OK.
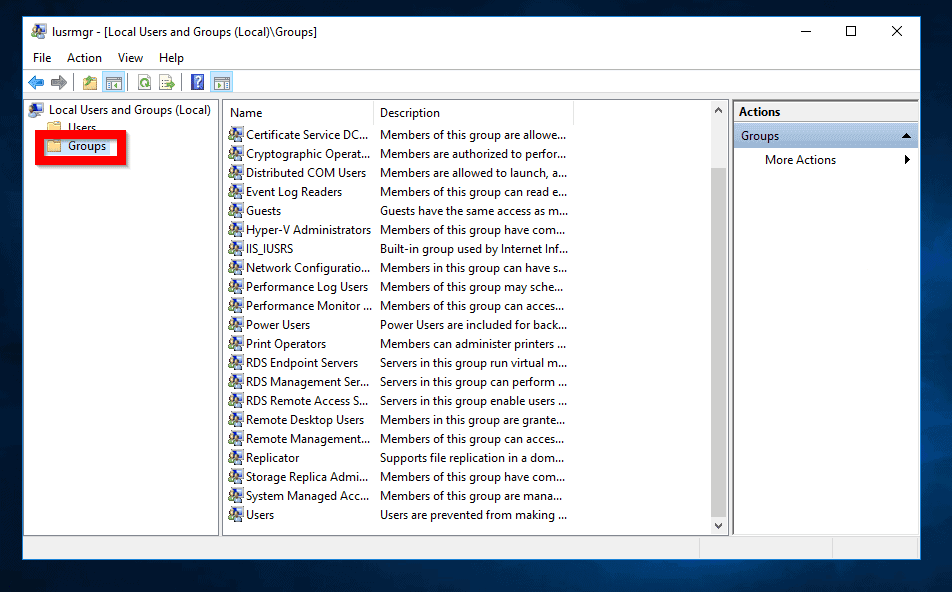
Step 4. Once Local Users and Groups is opened, click on the Groups node.
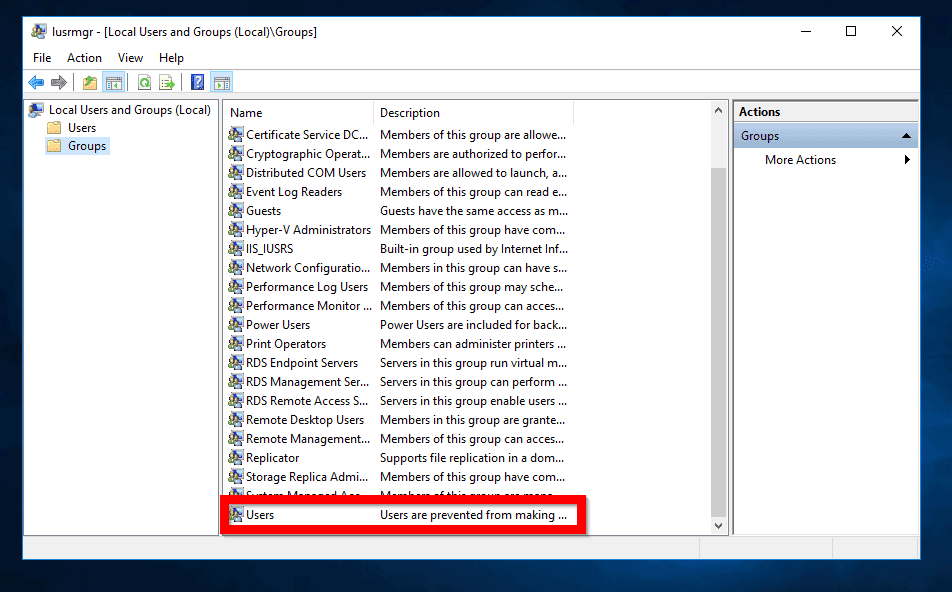
Step 5. Next, locate the Users group and double-click on it to open its properties.
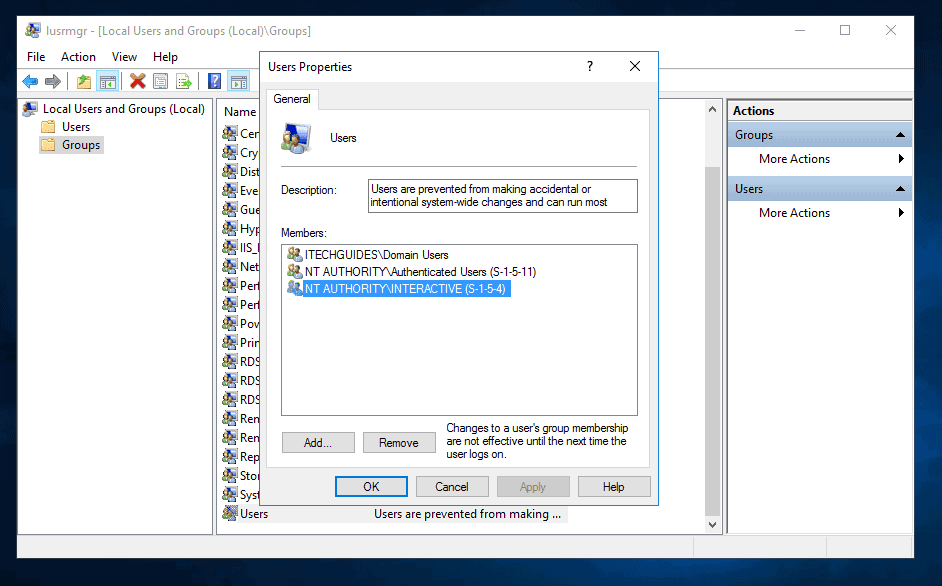
Step 6. Within the properties dialogue for the Users group AUTHORITY\INTERACTIVE is not listed, add it by clicking on the Add button.
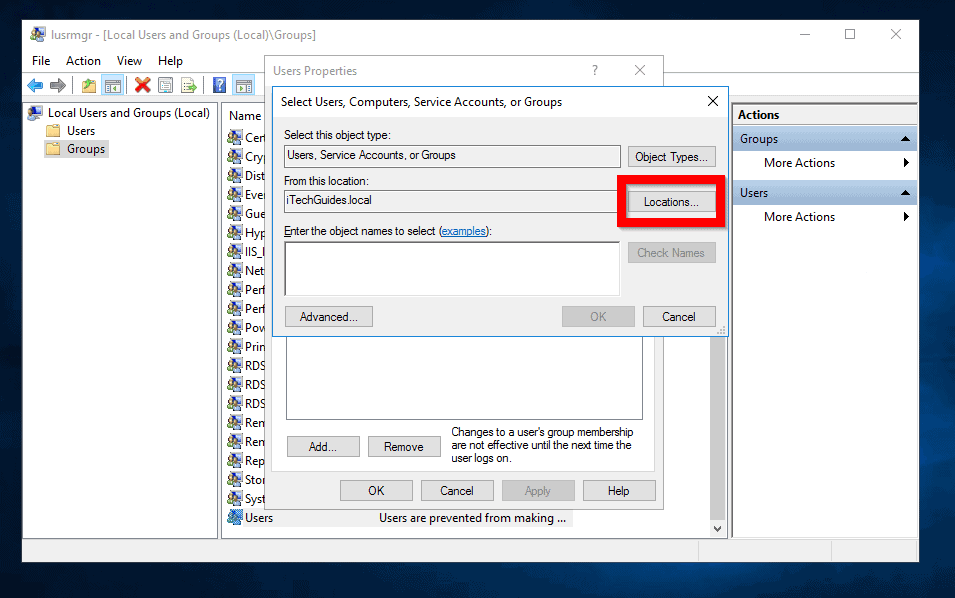
Step 7. Upon opening the Select Users, Computers, Service Accounts, or Groups window, click on the Locations button.
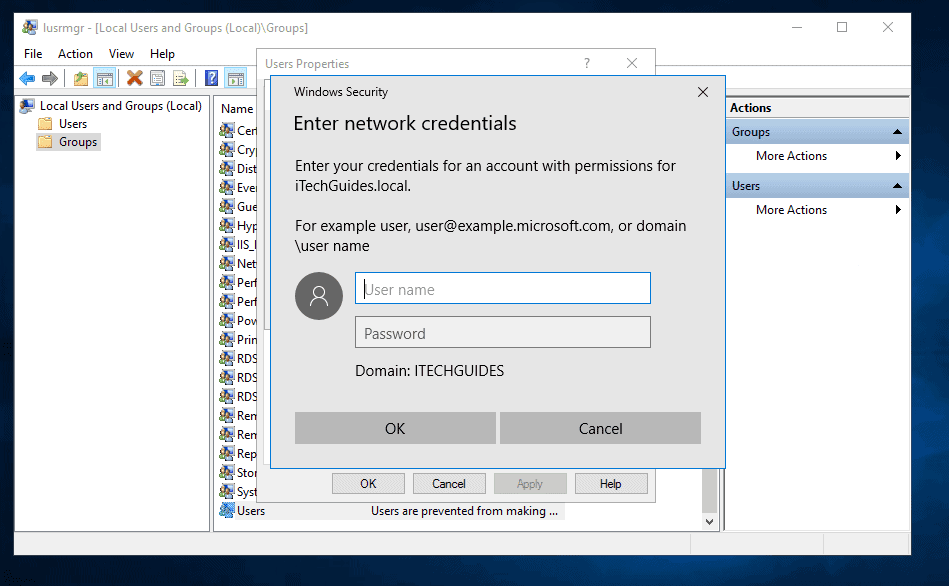
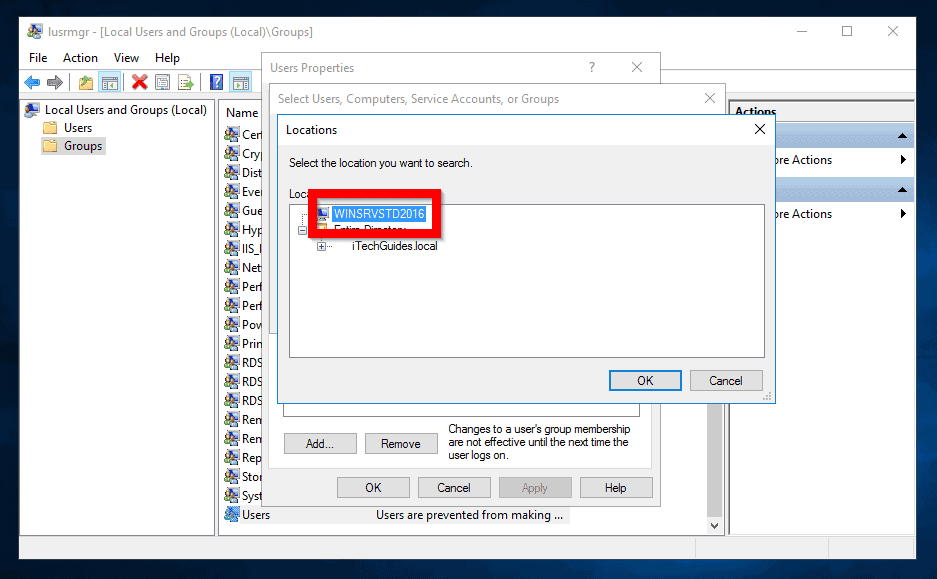
Step 8. If the server is part of a domain, you will be prompted to authenticate your domain credentials. Please click on the Cancel button.
Then click on the server name and choose OK.
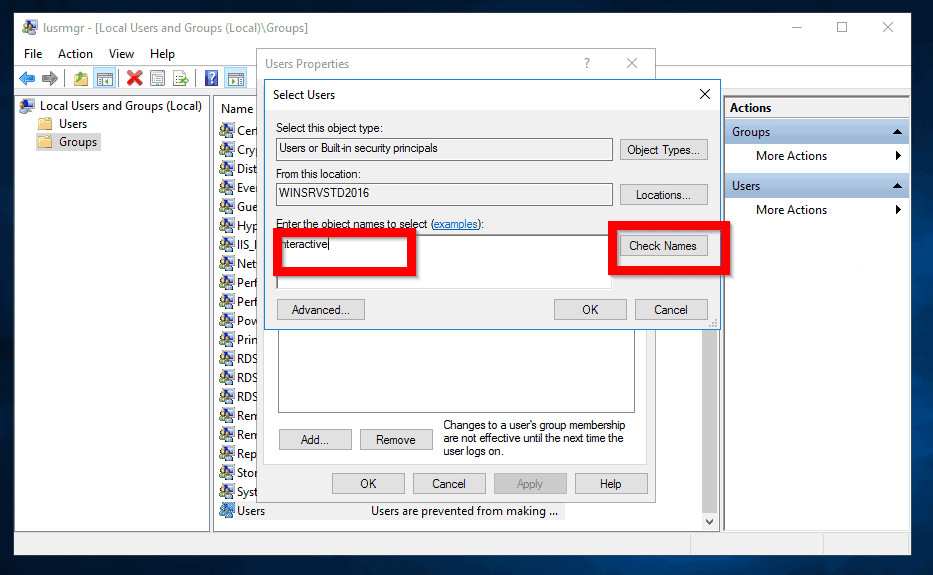
After canceling the domain authentication prompt, you will be redirected back to the Select Users screen. In the Enter the object names to select field, type interactive, and then click on the Check Names button.
Step 9. To complete the process of adding the user to the Users group, click on OK.

If applying this solution fails to resolve the black screen on Windows Server after login, you may attempt the final method.
3. Turn off UAC (User Account Control)
Similar to the other fixes outlined in this guide, disabling UAC has successfully resolved the Windows Server black screen issue after login for many users.
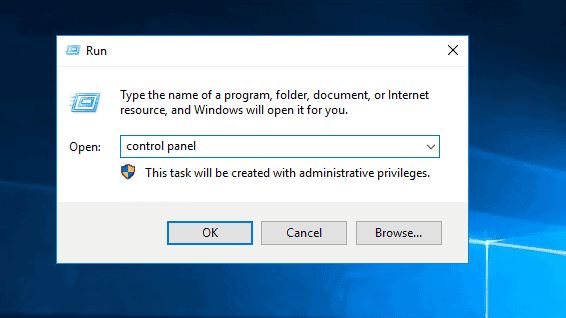
Step 1. Open the Run command window, and type control panel in it and click OK.
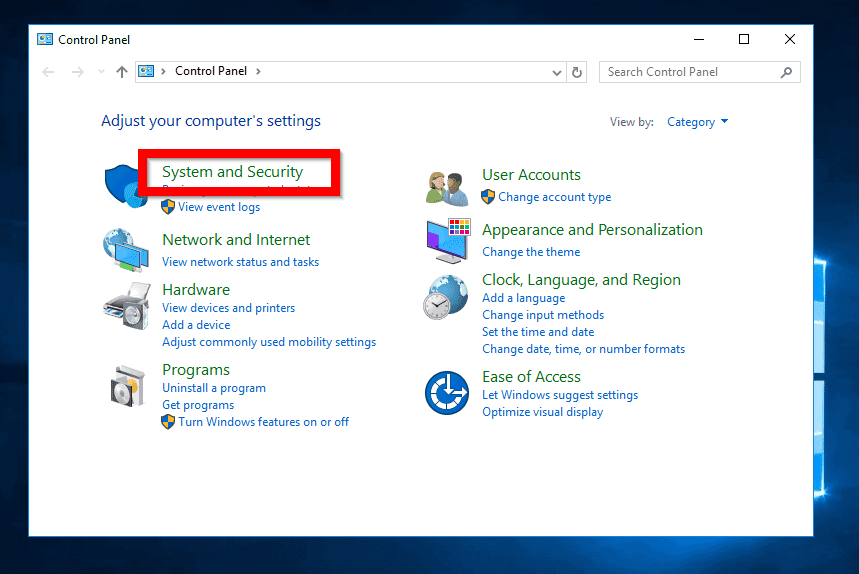
Step 2. Once the Control Panel window is open, click on System and Security.
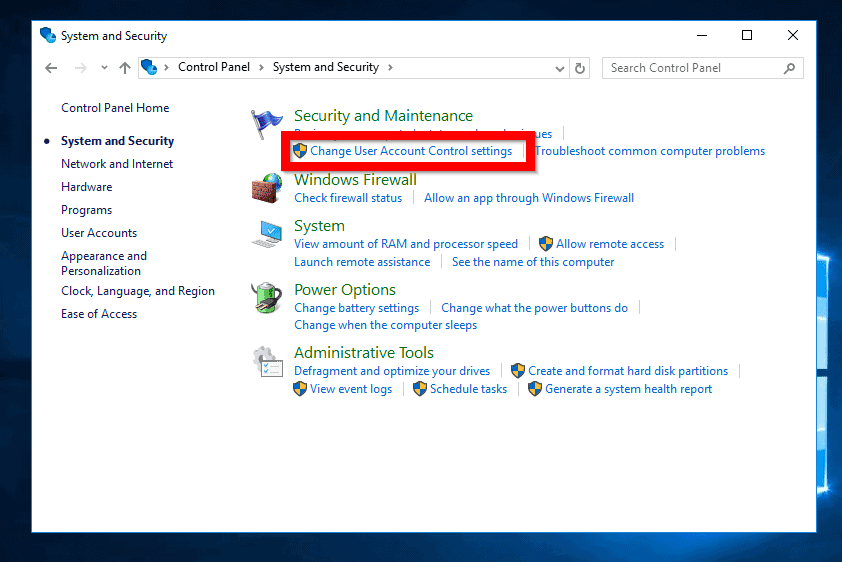
Step 3. Within the System and Security group, click on Change User Account Control settings.
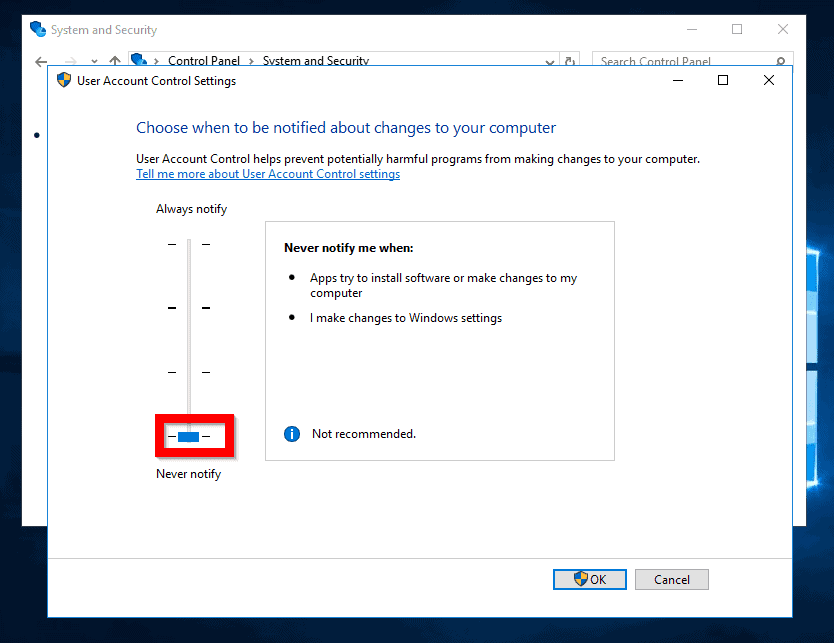
Step 4. In the User Account Control Settings window, move the highlighted bar to the bottom-most position (labeled "Never notify"). Once done, click on OK to save the changes.
After making the changes, log off of the RDP session and then log back in. The black screen issue on Windows Server after login should now be resolved.
Extra tip: backup your Windows Server with best server backup software
Besides the black screen problem of Windows Server, it is also likely to have system failure, data loss, virus attack, physical disaster, etc. Have you spent a lot of time and money installing the system and downloading many applications? Have you even become very frustrated because of the above-mentioned situations? If you have ever encountered these problems and want to avoid them, then you can backup your Windows Server. In this way, when you encounter a disaster, you can recover your system or files from it and recover your computer quickly.
So here I recommend the best and most professional backup software - AOMEI Backupper Server, it has many powerful features:

- Various backup options: You can create system, file, hard drive, and partition backups. It also enables you to create Windows Server recovery disk.
- Fascinating Backup Scheme: You can automatically remove outdated backups in order to free up
- Flexibel Backup Methods: You can create full, incremental, and differential backup, catering to various requirements. It allows you to perform daily, weekly, or monthly backups, as well as event triggers or USB plug-in.
- Wide compatibility: This software supports all Server OS including Windows Server2003, 2008 (R2), 2012 (R2), 2016, 2019, 2022, and 2025 and it is compatible with a range of file systems, such as NTFS, FAT32, EXT2, and EXT3.
You may download the 30-day free trial version to test the software and follow the following steps to backup your Windows Server.
Step 1. Open AOMEI Backupper Server and select Backup from the main menu. Next, choose System Backup from the available options.
Tip: You can also select other backup options, like Disk Backup, File Backup, and Partition Backup to create a copy for your target items.

Step 2. Next, specify a destination where the Windows Server system image will be saved.

Step 3. Click on Schedule Backup and Backup Scheme to configure them according to your requirements. Once done, click on Start Backup to initiate the creation of the system image backup for Windows Server.

🔥Hot: Windows Server 2025 now available
Windows Server 2025 was released on November 1, 2024. Following are some of the newest developments in Windows Server 2025:
- Desktop Shell: Upon signing in for the first time, the desktop shell is designed to match the look and feel of Windows 11, providing a familiar and modern user interface.
- Bluetooth: Windows Server 2025 now supports Bluetooth connectivity, allowing you to seamlessly pair and connect devices such as mice, keyboards, headsets, audio devices, and more.
- DTrace: Windows Server 2025 includes DTrace as a native tool, providing a powerful command-line utility for real-time system performance monitoring and troubleshooting.
- Email and accounts: You can now add Microsoft Entra ID, Microsoft account and Work or school account in Windows Settings in Accounts > Email & accounts for Windows Server 2025. It's important to keep in mind that domain join is still required for most situations.
If you'd like to experience all these wonderful features, learn how to do Windows Server 2025 in-place upgrade here.
Summary
This article describes three detailed and effective ways to solve the problem of Windows Server black screen after login and recommends a professional Windows Server backup software. This software is simple and friendly for newcomers. Now follow the steps in this article to try it!