How to Save Backup Image Files on the WinPE Bootable USB Flash Drive Created by AOMEI Backupper?
Introduction
AOMEI Backupper is a very useful data and system backup program for personal and business users. You can use AOMEI Backupper to regularly create system backups, disk backups, file backups, outlook backups, email backups, and so on. In case of data loss or system corruption, it is easy to restore important data and recover the system without reinstalling the operating system. If a PC gets corrupted, it is necessary to create a WinPE bootable media so that you can boot the PC into WinPE to restore your backup and get your system back to work.
Normally, you can save the backup image files on an internal and external hard drive or NAS/share on the same LAN. In an emergency of PC crash, you can boot your PC into WinPE created by AOMEI Backupper and then select the backup image files on the hard drive or NAS to restore the backup. However, due to the driver issue, the hard drive or NAS might not be detected or accessible under WinPE. To restore the backup, it is convenient to directly save backup images on the same WinPE bootable media created by AOMEI Backupper.
In this article, we will describe how to save backup image files on the WinPE bootable USB flash drive created by AOMEI Backupper.
How to Save Backup Image Files on WinPE Bootable USB Created by AOMEI Backupper
Before you do
- A USB flash drive large enough to save backup images.
- Image files created by AOMEI Backupper.
Method 1
The WinPE bootable media created by AOMEI Backupper is for Legacy and UEFI dual boot so the default partition file system format is FAT32. For the FAT32 partition, a single file size is up to 4GB.
If the single backup image file is less than 4GB, you can save the backup image file on the same bootable USB drive FAT32 partition.
Step1. First, create a WinPE bootable USB flash drive. For example, we insert the USB flash drive G:. Please check the detailed instructions here.
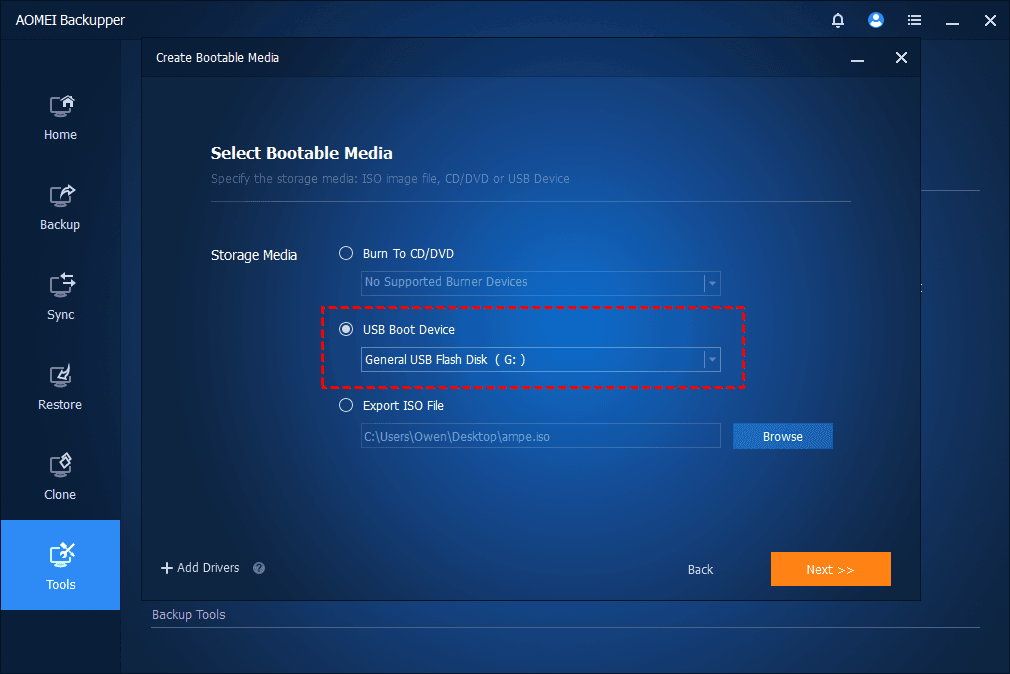
Step2. Once the bootable USB is created successfully, you can either create a backup with the USB flash drive G: as the destination.
Tips: If the backup image is over 4GB, the backup image will be split into many 4GB image files due to the FAT32 partition file system limitation. It does not affect the image restore.
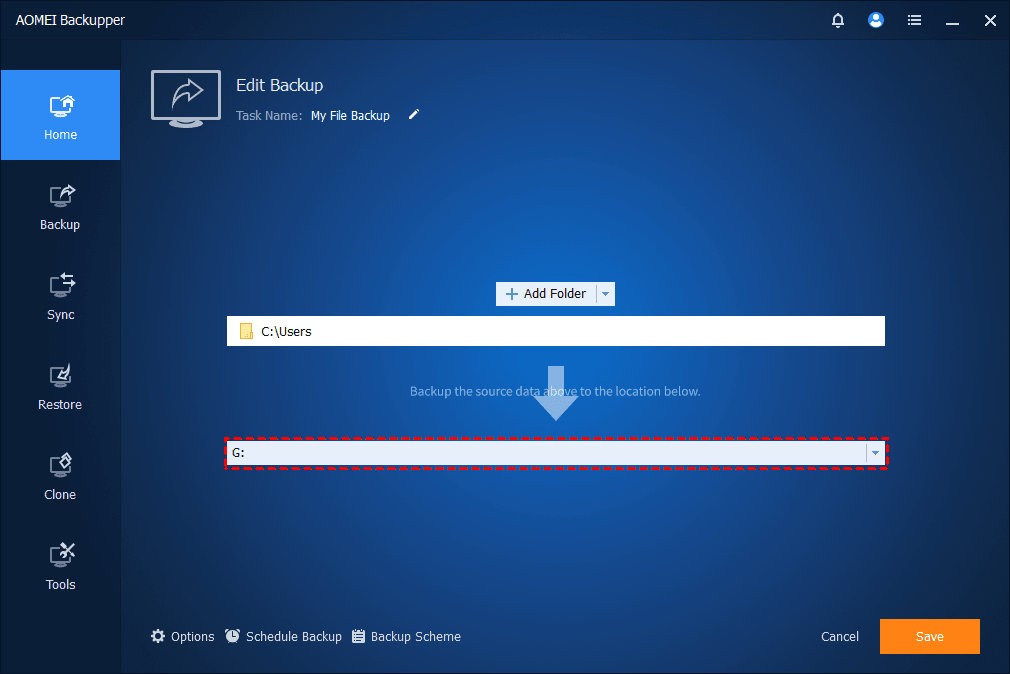
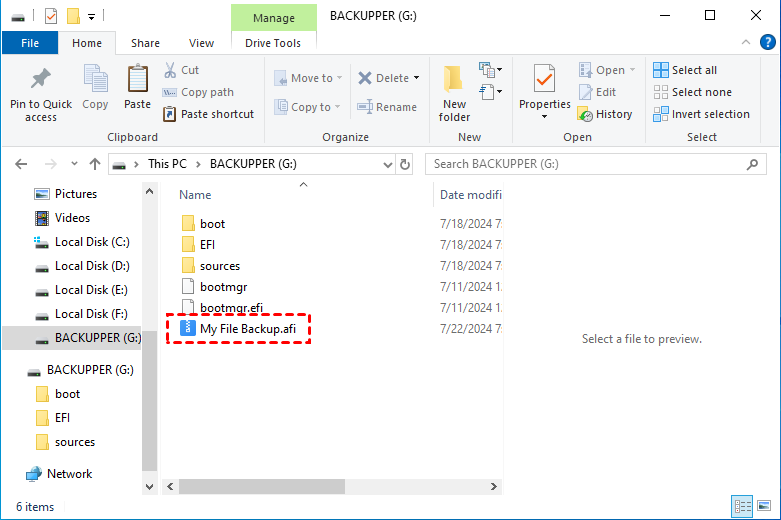
Or, you can copy the backup image (less than 4GB) you want to restore to the USB flash drive G:. Finally, you will find the backup image saved on the bootable USB flash drive.
Method 2
If the single backup image file is over 4GB, it is unable to save the backup image file on the same FAT32 partition.
You can split the bootable USB to create another NTFS partition on the flash drive and then save your backup images on the NTFS partition.
Step1. First, create a WinPE bootable USB flash drive following the same Step1 in Method 1.
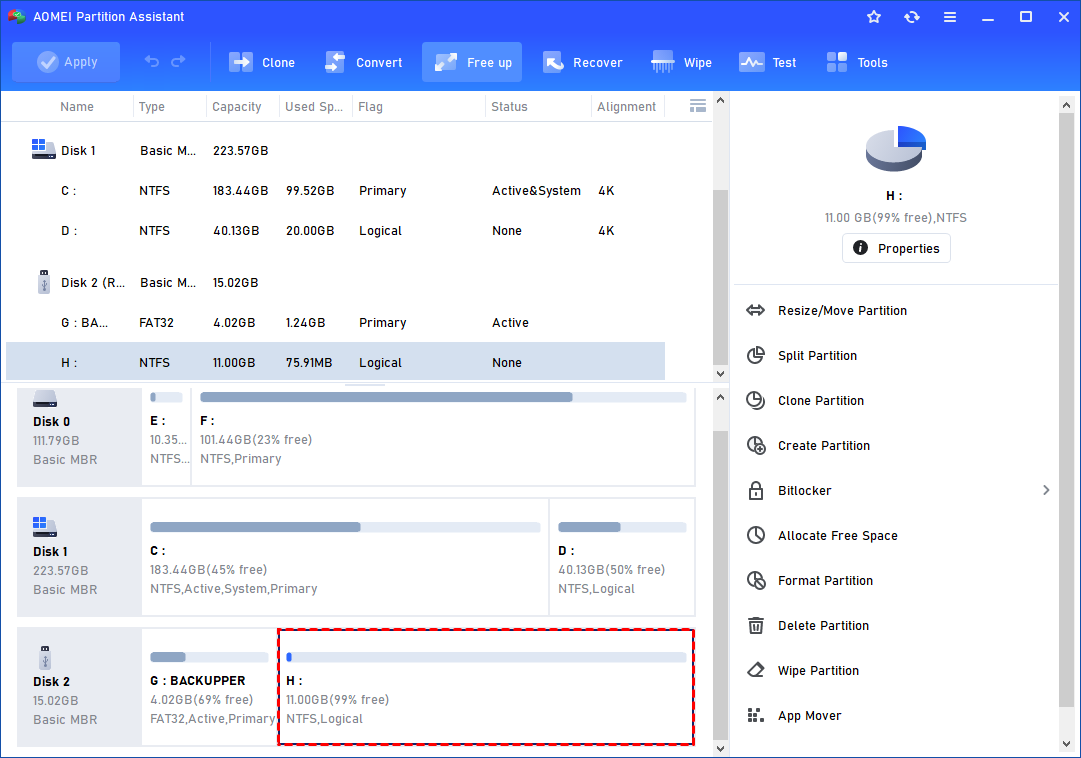
Step2. Split the USB flash drive to create another NTFS partition. Here, we use AOMEI Partition Assistant to create the NTFS partition H:.
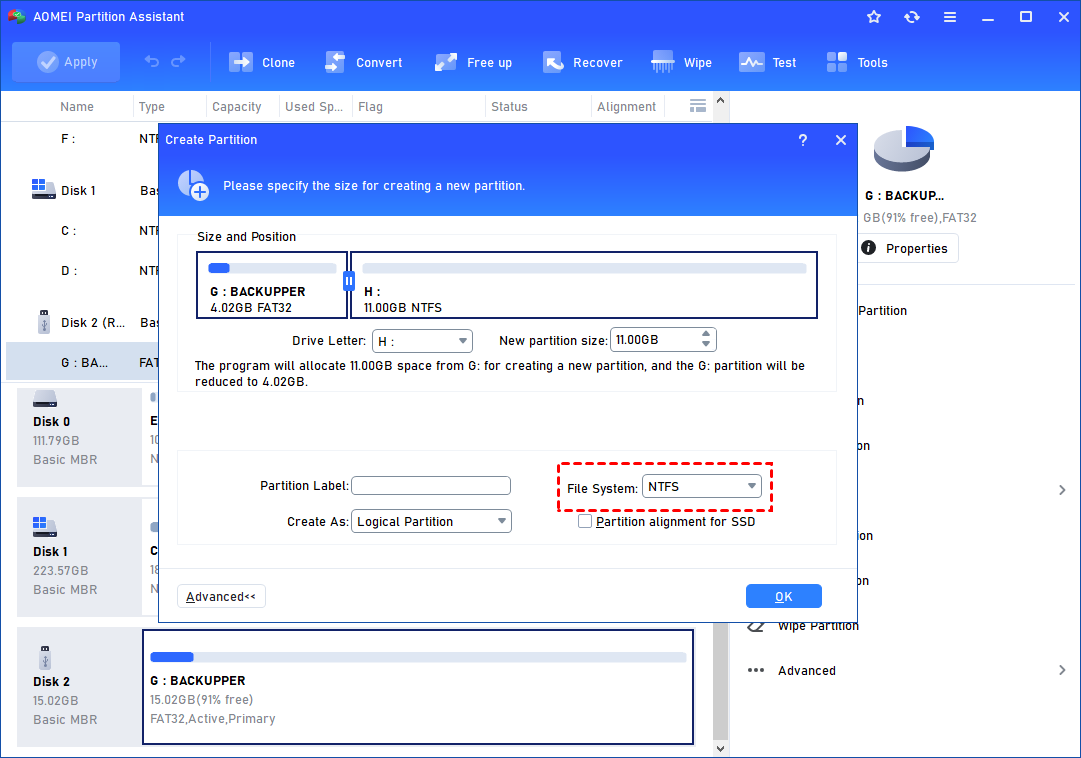
Step3. It might take time to create NTFS partition on the WinPE bootable USB. Please be patient. After the operation is finished, you can see the NTFS partition H: created on the USB flash drive.
Step 4. You can either create a backup task with the USB flash drive H: as the destination.
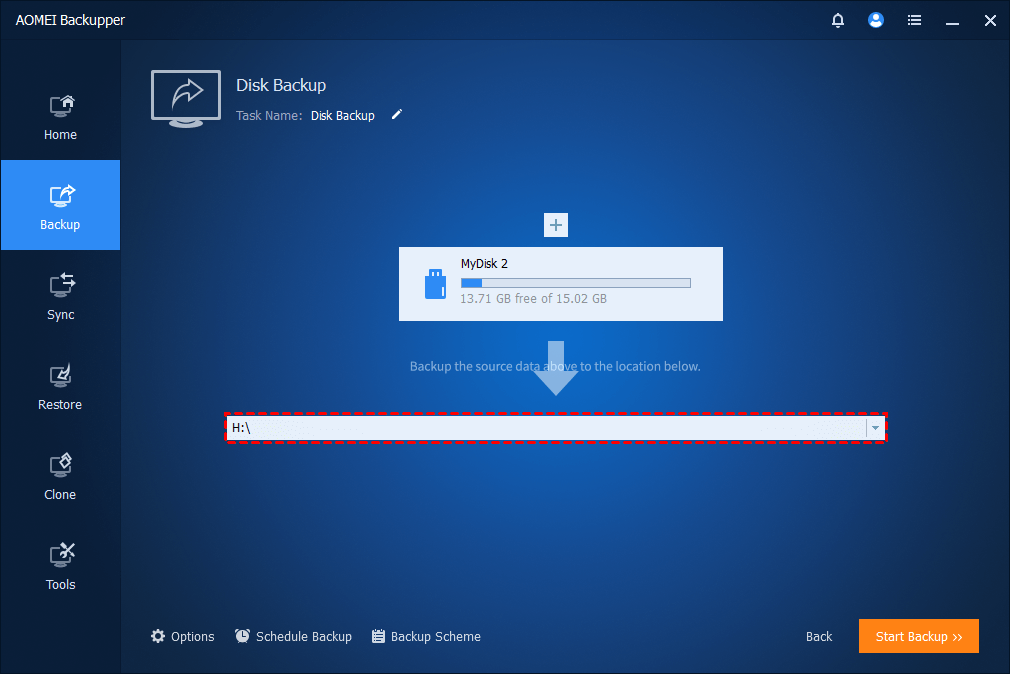
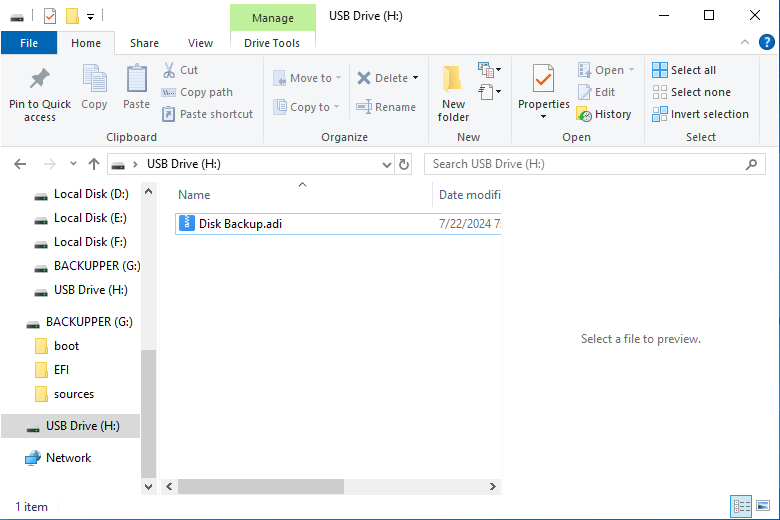
Or, you can also copy the image file you want to restore to the USB flash drive NTFS partition H:.
In the end, you can boot your PC into WinPE to restore the backup image file saved on the WinPE bootable USB flash drive.
Note:
- If the USB is only unallocated space before you create the bootable USB, the creation of bootable USB will only create a small FAT32 partition on the USB and the rest space will remain unallocated space. In this case, you can directly create a new NTFS partition on the unallocated space with Partition Assistant. Then, you can either backup to the NTFS partition or copy image files to this partition.
Conclusion
With the help of AOMEI Backupper, you can easily create a WinPE bootable media and backup images. In case of data loss or system crash, you can restore the data and system under WinPE.
Following the above 2 methods, you can directly save the backup images on the same WinPE bootable USB flash drive created by AOMEI Backupper. In this way, you can directly select the backup images on the bootable media and then restore your important data or system.